The subtleties of making a sleeping bag with your own hands
Not trusting domestic and Chinese manufacturers, the most desperate tourists and hikers sew sleeping bags with their own hands. Especially when you want to make a truly warm product that replaces a homemade blanket both in terms of comfort and in terms of heat saving in winter conditions. A home-made sleeping bag is significantly superior to a purchased one in terms of price / heat saving ratio.
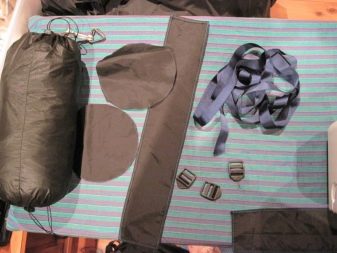
What is needed?
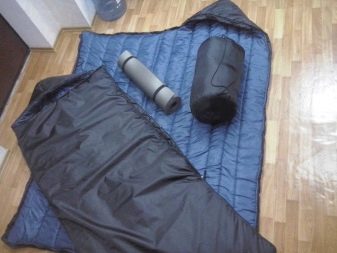
The device of the sleeping bag remotely resembles a two-layer tent. The outer fabric must wick away moisture, which will allow you to stay dry, even if condensation has formed in the tent. In the simplest case, the material for sewing can be raincoat fabric with water-repellent impregnation. Inner layer - cotton fabric, like the one from which pillowcases, sheets and duvet covers are made. The middle layer, if the sleeping bag is winter, is usually a synthetic winterizer or fleece, in special cases - any woolen blanket.
Any zipper is suitable for fastening. Ideally, with metal teeth, it will last much longer than plastic. It is advisable to acquire kapron threads.
They may require more than one coil, stock up on a small reel in advance. You can get the job done with 1-2 needles, but things will go faster with a sewing machine.

Model options
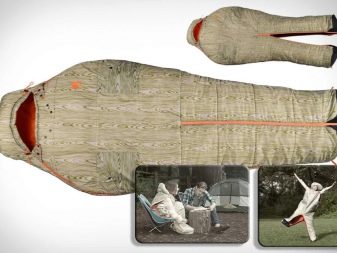
The device of the sleeping bag according to the external design differs in free cut and with a puff around the face. The hybrid sleeping bag is equipped with slits for arms and legs in arbitrary places, allowing you to sleep more comfortably.
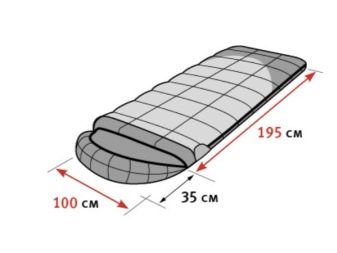
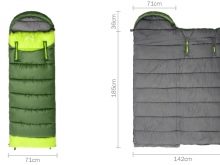
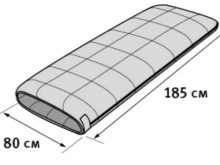
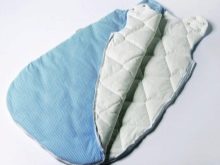
The envelope
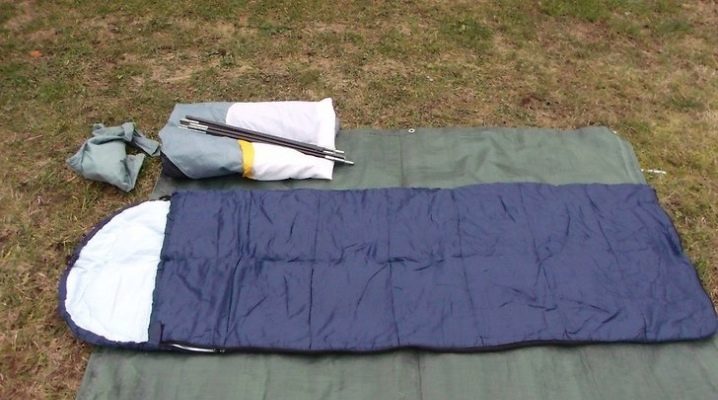
A sleeping bag sewn according to the “envelope” scheme provides for only 2 types of fabric: synthetic with water-repellent impregnation on the outside and a cotton layer on the inside. The length of the zipper is at least a meter. Pattern and tailoring will not take much time.
- Cut out 2 rectangles of outer fabric measuring 190x160 to 250x180 cm. For the inner covering, the same pieces are required.
- Attach the layers of the inner fabric to each other.
- Attach layers of outer fabric to each other - their front sides should be opposite.
- Run the folded layers through the sewing machine, leaving at least a centimeter from the edge.
- Do not finish the last seam to the end: this will make it possible to turn the product through it.
- Once inside out, secure it with a hidden seam.
- Sew 2 transverse quilting stitches, spreading them on both sides at the same distance.
- Connect the bag in the middle along its length, turning the front side inside.
- Tack the edges with a single seam starting at the bottom, running along the bottom cut and rushing down the side towards the head.
- When you reach the middle of the seam, sew on the zipper and turn the bag inside out. The result is an ultra-light envelope.
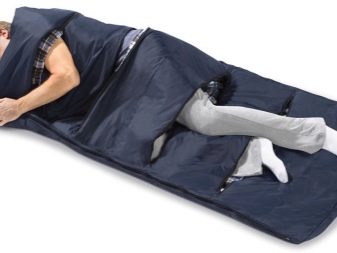
hybrid sleeping bag
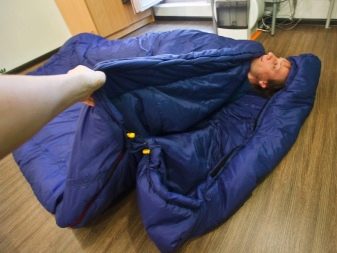
In the sleeping envelope, made according to the previous instructions, cuts are made into which additional zippers of a shorter length are built in. Purchase 2 or more zippers (as many as you need). The length of the cut should be a few centimeters shorter than the width of the sleeping bag.
- Make cross cuts on the sleeping bag under these locks (along their length).
- Turn the edges of the cuts in at least a few millimeters and sew or tack the edges by hand.
- Position one of the zippers so that its fastening parts lie flat along the folded edges of the slit. The zipper itself should be sewn on the inside of the sleeping bag, and not on the front.
- Grasp its ends by hand with a needle and stitch the zipper exactly along the cut with an even seam, avoiding distortions. To be sure of the reliability of the sewn-in zipper, you can make parallel seams that fasten the lock together, 3–4 mm apart.
- Sew the rest of the zippers to the other slits in the same way.
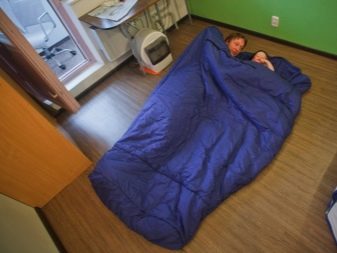
Sleeping envelope with cuts is ready. Check if you are satisfied with the resulting fastening cuts by climbing into a sleeping bag modified in this way. All actions can be performed on a sofa or bed. It is also possible to modify a purchased sleeping bag. After making sure that you liked the result, go on a test hike nearby with an overnight stay at the first opportunity, do not forget to grab a tent.
The sleeping bag is particularly comfortable to use with a small pillow used in conjunction with an optional detachable headband. The latter is made according to the same scheme (with turning inside out in the process of sewing on a zipper) as the sleeping bag itself. By sewing additional layers of thicker material into the head part, you can do without a pillow.
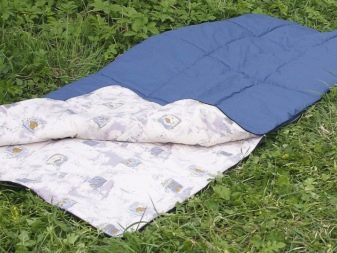
The sleeping bag can be modified: it is easy to turn it into a blanket by opening one of the longitudinal side seams and sewing a longer zipper there, running from the end of the previous lock along the entire length of the bag.In this case, the lock does not end at the bottom corner, but runs along the bottom seam in the legs.
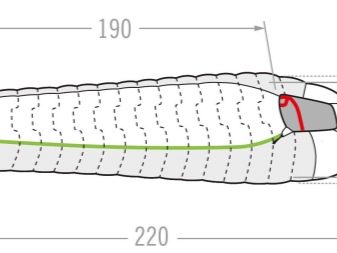
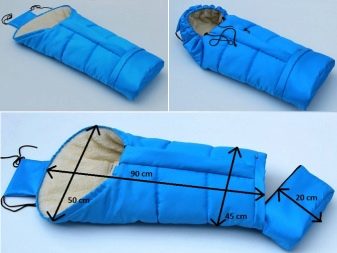
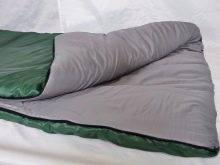
Cocoon
The width of a cocoon-type sleeping bag is not constant, like an envelope, but narrows towards the legs. After fastening, you will leave only the face uncovered: along its perimeter, the head part is tightened with the help of a cord passing through the longitudinal loop, which is also suitable for sneaker lace. On sleeping bags from the store for the head, special clips with springs are provided.
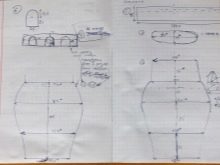
The step by step instructions are simple.
- Cut out rectangles from 2 types of fabrics (outer and inner) ranging in size from 230X120 to 260X150 cm. Prepare a pattern.
- Fold one of the rectangles in half along its width.
- Attach the pattern to the fold of the fabric and cut out the necessary part.
- Repeat the above steps for all fabric cuts. To insulate the sleeping bag, several inner layers are used. Do not overdo it: the sleeping bag may turn out to be too heavy and voluminous.
- Fold the pieces of fabric in layers on a large flat surface. Lay the bottom 2 layers first, then the top 2 layers right side up.
- Sew both upper layers around the perimeter with an indent of at least a centimeter from the edge. In the process of sewing the front parts, lay a cord or elastic around the perimeter so that its ends pass out between the layers of fabric. Leave small holes for the ends of the cord to come out.
- Leave an 20 cm unsewn section at the bottom (where the legs will be located) (this will help you turn the stitched fabric right side out). Then grab it with a hidden seam. You will receive an open bag with cord ends on the sides.
- Install the retaining clips to prevent the cord ends from being pulled back in.
- Fold the bag in half lengthways inside out.
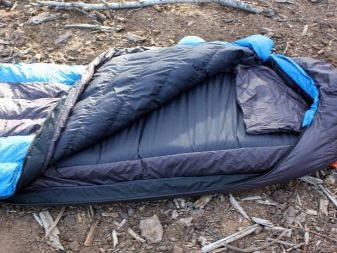
- Sew on the zipper, working from the shoulder to the bottom of the bag. The zipper will reach the middle of the bag or all the way to the end, depending on which lock length you have chosen. With a lock that reaches the middle, the rest of the edge is simply sewn together.
- Stitch along the bottom edge.
- Turn the bag right side out.
You can check the newly sewn cocoon in action.
Tips
To make a quality sleeping bag, follow some guidelines.
- For the outer fabric, use a material with waterproof impregnation, for example, raincoat fabric with a polyurethane layer. Not letting water through, such matter will also protect from the wind. The fabric must be tear-resistant, elastic, wear-resistant, quick-drying.
- To exclude contact with the ground during an overnight stay in a tent, the back part should have additional layers of insulation. As a cold insulator, both polyester and synthetic winterizer, any synthetics that do not pass cold well, are suitable. Camel wool is also considered truly warm. If you have a lot of old things that have already faded and gone out of fashion, do not dare to throw them away, but do an audit and remove the heaters from the jackets that have served their purpose - they can be used as a substitute for a blanket.
- The sleeping bag protects well from the cold of the earth. This is easy to check without placing anything in the tent under the sleeping bag itself: it is important that the cold does not pass. If the cold still passes through the layers of fabric after a few minutes, modify the sleeping bag by sewing in additional layers of insulation.
How to make a sleeping bag with your own hands, see below.


Great article. Many thanks for the work done!