How to make a camp stove with your own hands?
During a long trip, hot food is often not enough. Of course, a fire can be made anywhere, but not everyone will agree to this - a fire sometimes either becomes a source of fire or does not flare up due to the rain that has just ended. Not everyone wants to carry a gas burner with a cooking cylinder, which means that a do-it-yourself stove using the same firewood is suitable.
Advantages and disadvantages
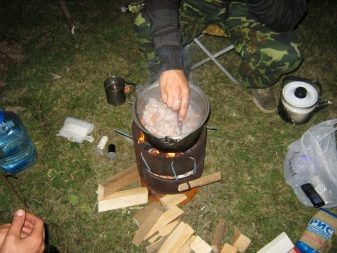
To light a mini-stove, you do not need a large armful of large firewood - everything will do, from reeds to chips and the resinous bark of dead conifers. The heat of such a furnace is consumed as efficiently as possible - the effect is comparable to a gas burner and even an electric stove.
To maintain the fire, coals that have not completely burned out in the previous fire will also fit: until the pieces of wood have turned into ash, they are still suitable for receiving heat. Cooking food over a fire will require at least several times the cost of wood. That is, with the amount of firewood going to one fire, 10 people can be fed hot food without problems using a wood chip stove.
The main requirement is that the oven heats the container with the food being prepared, and not the air around, which cannot be said about an open fire.
Varieties of a camping stove
According to the number of walls, the stoves are divided into single- and double-walled.
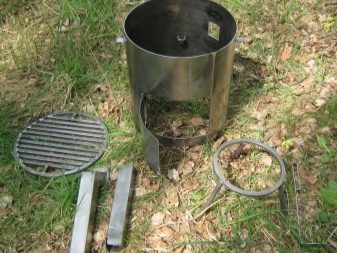
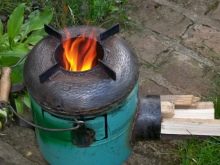
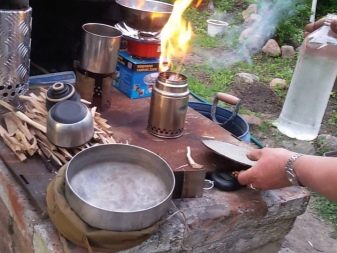
The furnace structure is assembled at the resting place either from improvised materials, or a pan is used in advance, a large can of canned food, sheets of old (possibly rusty) metal, for example, from under the roof, etc. Being easy to manufacture, such a stove is rightfully considered a truly touristic one.
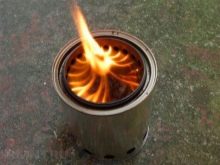
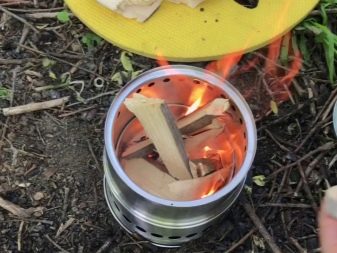
How should a wood chipper work?
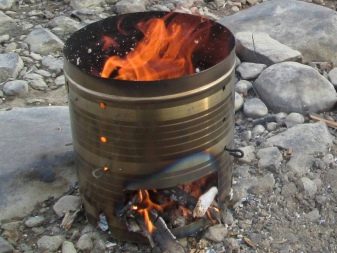
In order for the coals to smolder for a long time and give off heat, the structure without a bottom is located on the ground. Heat in this case is not dissipated in the surrounding space, but remains mainly in embers, while the air draft is reduced to a minimum, not allowing the closed fire to go out; when new wood is added, the fire will flare up quickly.
If the design of the stove provides for a lining under the bottom, the draft increases so much that cooking, which requires an hour or more, breaks down, the firewood quickly burns out. It is necessary to pull out the bottom from the stove in advance, and put the structure itself from the walls on the ground. Nevertheless, such a stove consumes fuel economically, is not affected by weather, takes up very little space, and almost no smoke is generated (while the coals are smoldering). The stove is easy to carry (easy to unfold).
It is possible that the wood, not yet fully inflamed, isolates heat well, which is why the walls do not have time to overheat, they can even be carried with bare hands. This does not eliminate the need for caution when handling fire.
Design options
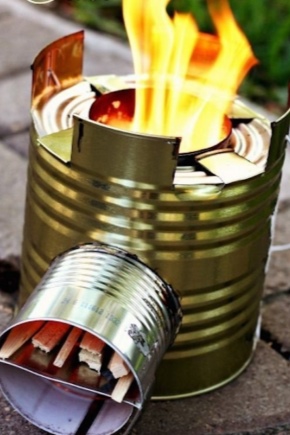
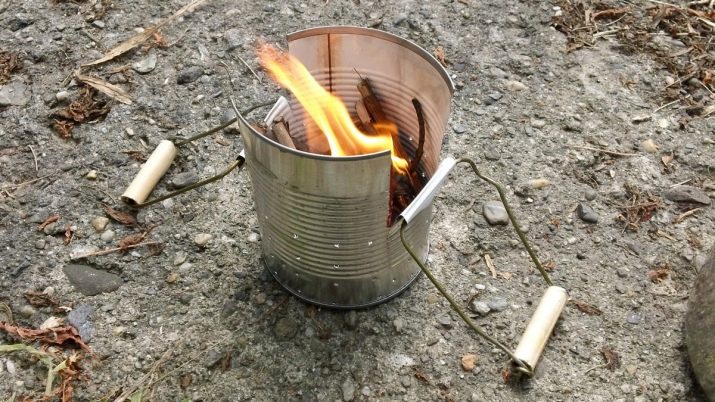
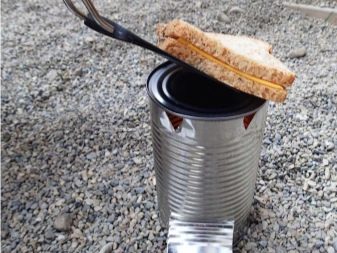
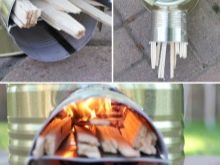
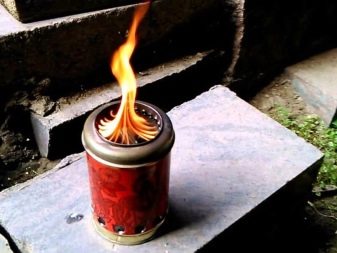
The drawing of such a product is very simple. To make a camping stove from a tin can, follow these steps.
- Make small holes in the bottom of the jar. The jar itself should be the height of a glass (for example, a jar of canned peas or condensed milk).
- Lay pieces of twigs, bark, etc. (each as thick as a finger) vertically, as in an Indian candle. Pull out the piece of wood located in the center - this will give way to air draft.
- Insert paper or an armful of dry grass into the vacant place and set it on fire.
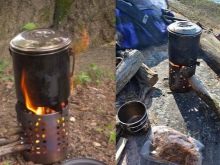
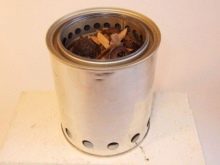
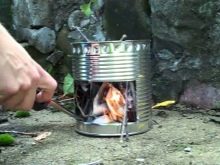
The fire will flare up, and such a “can fire” will burn for 20-25 minutes. This is enough to make tea, heat up canned food, cook soup or vermicelli from a pack, or even make a small portion of porridge. There will be almost no smoke.
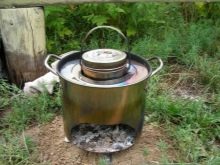
If at least a few people went on a hike, it is recommended to use a can, for example, from paint or even a metal bucket of 2-3 liters. The overall capacity of such a “can fire” will be for at least an hour of burning, and you can cook a full-fledged homemade soup from the chicken bought the day before.
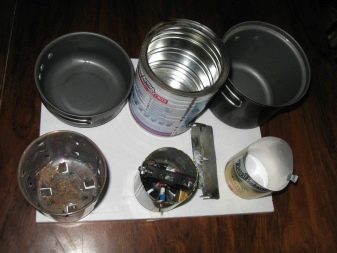
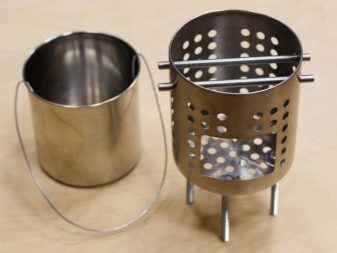
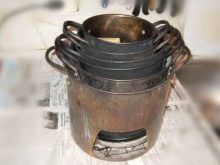
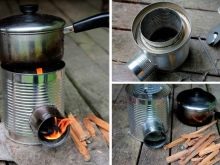
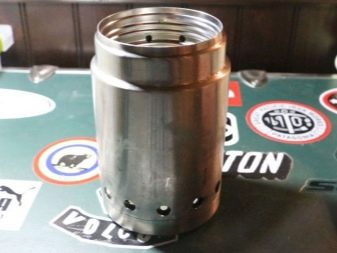
Double layer tank construction
Stainless steel pans (one slightly smaller than the other) are inexpensive and available at any hardware store. The whole structure does not burn out - unlike ordinary steel, scale does not form on it, it will work without problems for several years even with three daily use.
To make a double-layer oven, do the following.
- Cut a slot in the larger pan so that the firewood can be laid without problems.
- Punch small holes in the same pan to create traction.
- Place a smaller pot in a larger one - it will heat up from the pot in which the firewood is burning. You can load hot ingredients into a smaller saucepan.
- At the same time, the heat consumption is even more efficient - not only the bottom of the smaller pan is heated, but it is all on the sides.
The advantage of such a stove is the ease of transferring it under a canopy of a tent (for example, into a vestibule) - this will make it possible to cover the stove and the food being prepared from the sudden onset of rain.
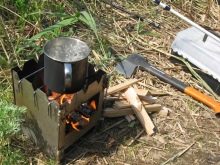
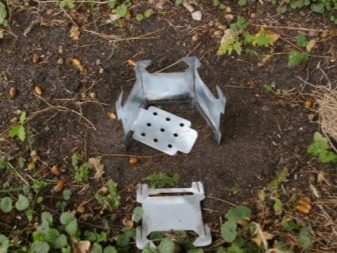
Folding stove on hinges
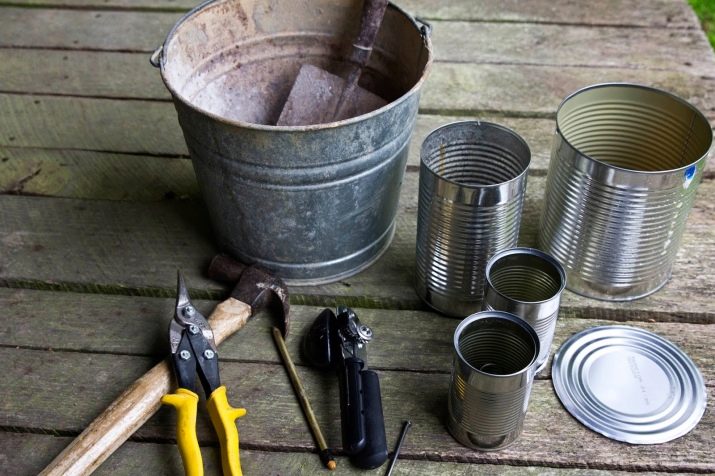
In addition to the hinges themselves and sheet steel (from the old refrigerator, the sidewall of the unused system unit case, trimming of roofing iron, etc.), you will need tools and consumables: a drill and drill bits, a grinder and a disk for it, a screwdriver and “bits” to it, measuring tape, file, pliers, bicycle knitting needles.
The step by step guide looks like this.
- According to the design sketch, mark and cut the sheets of steel with the help of a grinder.
- In the wall that serves as the bottom, drill small holes, smoothing the resulting burrs with a file.
- Attach the loops to the sidewalls of the structure and connect them into a rhombus.
- Slide the bottom under the walls fastened together, in which the edges are folded in advance towards the other edges at the bottom of the walls. These grooves form something like a metal capillary into which the spokes are inserted, which will allow you to set the stove to the required rigidity in a ready-to-use form. If necessary, the spokes can be easily removed, and the stove can be transported or stored away.
- Cut an opening from one of the sides into which new firewood is laid.
- You can start cooking on such a stove - being square and at the same time representing a transformer (it is folding, the walls are a rhombus, and not just a square), it will also serve as a barbecue.


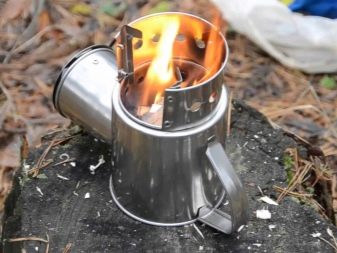
Multi-can oven
You will need:
- 3 cans, two of them are smaller and one is large;
- scissors for metal and asbestos.
Take the necessary action.
- Attach a smaller jar to a large jar at a distance of 20 cm from the bottom and circle it with a pencil or marker, this will form an even circular line.
- Cut a hole along this line, while the smaller jar will fit into it with noticeable effort.
- On one side of the jar, cut 2-3 cm gaps.
- In the lid of a large jar, cut a hole for a small one, clean out the burrs.
- In the wall of the smaller jar, make vertical slots of 1.5-2 cm.
- Fill the empty space between the cans with asbestos, then close the lid and connect the edges by bending them.
- From a piece of tin, make a stand for firewood and fix it.
- Attach a carrying handle to the entire structure.
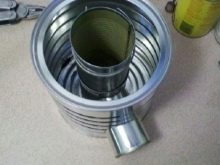
The resulting design will be very economical in fuel consumption, and the heat will not overheat its outer walls. Stove painting is allowed.
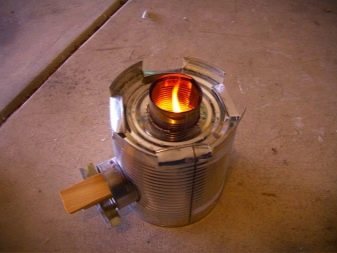
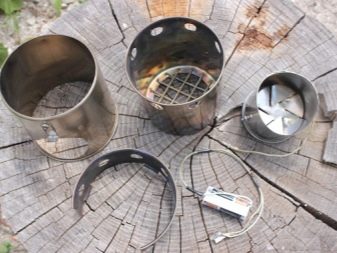
The Bond stove differs from the usual one, made of three cans, by the presence of accelerated blowing - instead of a firewood shelf, a fan with batteries is placed in the firebox, and firewood is laid from above.
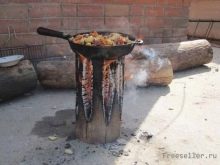
rocket furnace
A homemade rocket stove will require a helium or other compressed / liquefied aerosol canister. The following steps are to be taken.
- Release all gas from the cylinder.
- Cut off the top of the balloon and cut out the side opening. The more firewood is laid, the wider the hole is required.
- Make an additional slot in the profile pipe for more reliable contact with the cylinder itself.
- Ensure unobstructed draft by drilling additional holes in the cylinder.
- Attach the retaining legs to the bottom of the cylinder so that the stove does not collapse during cooking.
- Attach a sheet of metal with a hole or a grate from some device, or an old pallet to the top of the cylinder - this will allow you to put more voluminous metal mugs and pans on the stove, which greatly expands the use of such a stove.

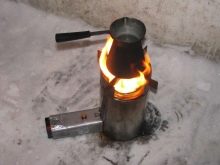
The rocket stove is ready for use, it will consume no more firewood than a wood chipper.
A kind of rocket stove is an old thermos stove - outwardly the second one resembles the first one, while it does not allow the heat from the flame to go outside. The inner container of the thermos must be metal: neither glass nor plastic can withstand fire.
pyrolysis oven
The pyrolysis type is difficult to self-manufacture: it uses the combustion of garbage plastic and rubber, increases heat transfer and reduces fuel consumption. The principle of operation is the pyrolysis (decomposition) of solid fuels (wood, plastic, rubber, resin, etc.) into lighter organic matter that burns without soot. Firewood decomposes at 450 degrees, which dramatically reduces their consumption. Plastic and rubber require 900 degrees heat.
A pyrolysis oven is easier to buy, but it is noticeably more expensive than a simple wood chipper. But both the pyrolysis oven and the wood chipper are equally good for cooking in a frying pan, saucepan, or even in a small cauldron.
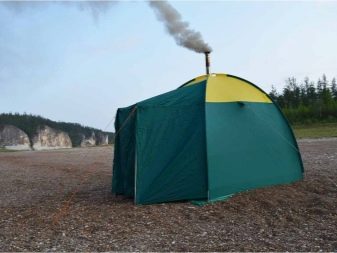
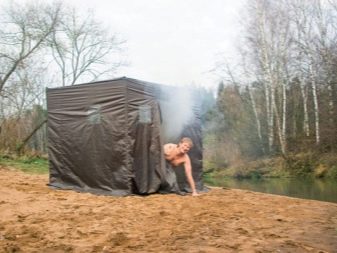
Use as a steam generator
You can turn the stove into a steam generator by placing any vessel on it and pouring a little water into it, while the bottom of a metal mug or pan heated to several hundred degrees should be filled with a small amount of water.
If this is not a two-layer wood chipper, but a simple potbelly stove, the walls of which are red-hot in less than an hour of work, it is enough to apply water from a spray bottle to these walls, which immediately turns into steam from contact with hot metal, which will ensure that the tent-bath is quickly filled with steam in hiking conditions.
How to make a camp stove with your own hands, see the following video.