How to make a heat exchanger for a tent with your own hands?
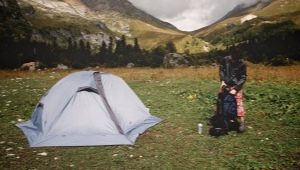
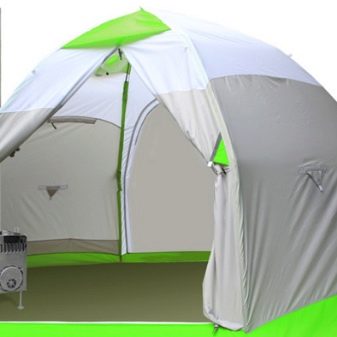
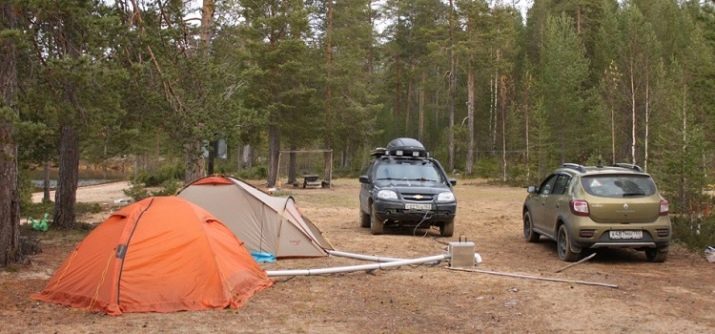
Every tourist (hunter, winter fishing enthusiast) is convinced that a tent consisting of 2 layers is much better than a tent with one layer. It effectively protects against frost and heat, creating something like a thermos. But in a fierce winter, it is simply impossible to do without additional heating.
The problem can be solved by a heat exchanger for a tent. This small and light device guarantees a safe and fast supply of thermal energy, making it possible to heat large tents.
Description and principle of operation
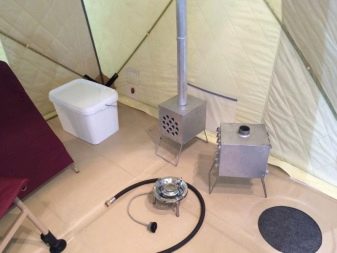
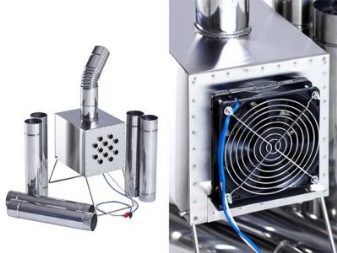
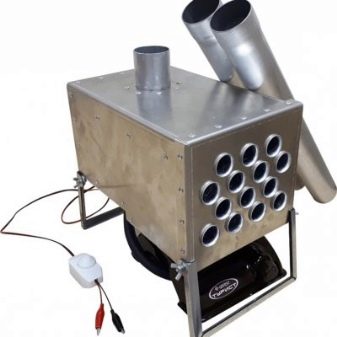
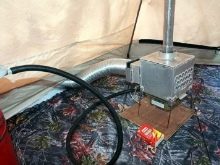
Unlike most other heating devices, this device vents the products of combustion to the outside, so that there is no need to open access to fresh air and incur losses in the generated heat. For this purpose, the tent must have at least one hatch in the upper part. In addition to the chimney, the design features should highlight the presence of air-heating tubes and a fan to increase the result (operated by a rechargeable battery or batteries).
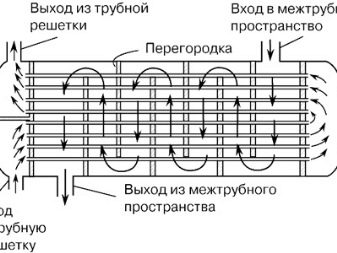
The activity of the heat exchanger is built on the combustion of fuel, which is transformed into heat. The burner located below heats the heat exchanger tubes, through which air is drawn by means of a fan. Passing through them, it also warms up and enters the tent. The products of combustion, formed as a result of the combustion of fuel, go outside through the chimney. A similar structure is close to fire-tube heat exchangers used in solid fuel boilers, and it functions in the same way. The air passing through the heated tubes is converted into dry heat and heats the interior of the tent.
Heat transfer devices may have different thermal radiation. Some are more powerful, some are weaker. This important technical parameter depends on several factors:
- thermal power of the burner;
- heated area;
- the material from which the device is made;
- heat exchanger configuration.
As for the configuration, the round version is more efficient than the rectangular one, as there are no corners where heat could linger.
Varieties of designs
To increase and maintain the level of air temperature in the tent at the desired height, various types of heating devices are used.
Alcohol and paraffin candles
They can be used in a single tent at an average daily air temperature of up to -5 degrees. For heating a larger room, their resource is not enough.
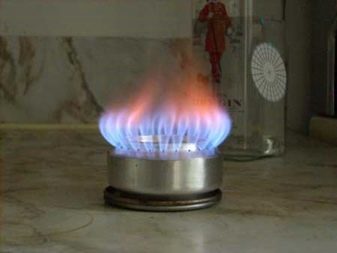
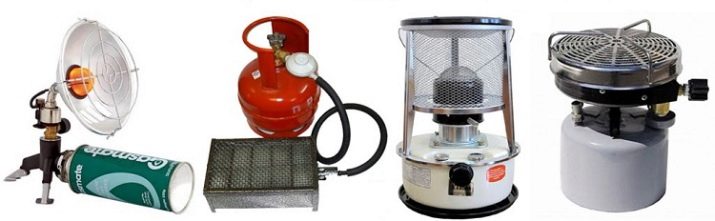
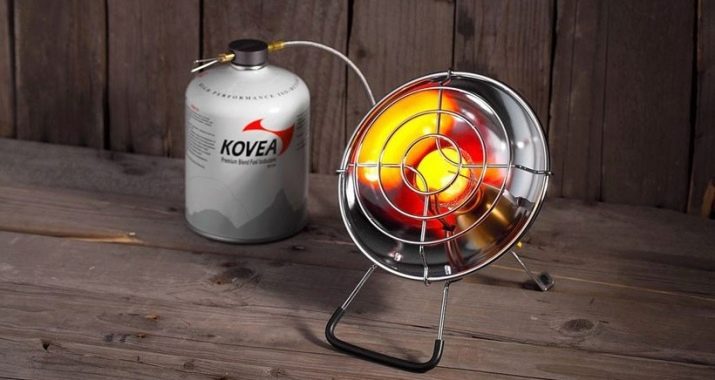
Gas heaters
The source of fuel in this case is a 5-liter gas cylinder, and the source of thermal energy is a gas burner, usually equipped with a convector. Such heaters are used not only in the format of a heat generator, they can also be used to cook or heat up food.
The main drawback is the significant fuel consumption. In this regard, they are practiced in areas that are easily accessible by road. Portable gas heaters differ in the degree of danger in terms of fire protection. Actually, they are the most common cause of fires.
Gasoline heaters
They have been used for heating for a long time, and their structure, in fact, has not changed over the years. These devices are also in demand because the unit costs of finance for the purchase of fuel are the smallest compared to other heating options.
But besides this, in a room heated by a gasoline stove, there is always a smell of fuel. When operating a heater operating on gasoline, it is necessary to strictly follow the rules for use - Insufficient cleaning of the burner can become a factor in the explosion and fire.
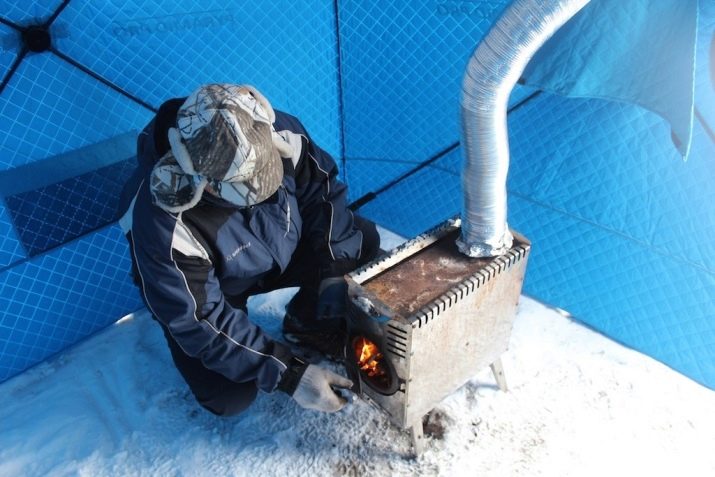
Solid fuel structures
Stoves, in which firewood acts as an energy carrier, have been and continue to be in demand in forest areas. Here it is only necessary to collect dead wood and use it in a heat exchanger for a winter tent. Folding steel stoves of various designs are comfortable during transportation, as they take up little space in the car trunk.
During operation, they require constant monitoring and laying firewood.
Instructions for making a heater
Consider several ways in which you can independently make a camping heater.
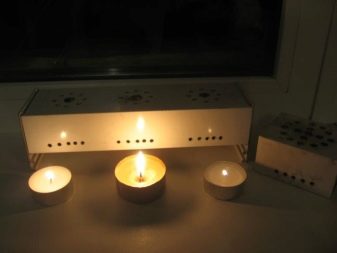
From a candle
The most convenient version of a miniature tent heater is done like this:
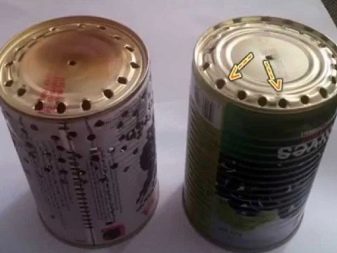
- 2 cans of condensed milk are taken, from which it is necessary to cut off the bottom;
- then they are inserted into each other in such a way that one of them plays the role of a cover;
- after that, holes are made at the top and bottom for the transfer of thermal energy, a self-tapping screw is screwed in the center of the bottom of the heater, and for comfort a handle is made in the top bank.
How it functions:
- a paraffin candle is carefully screwed onto the self-tapping screw and set on fire (it will be a source of thermal energy), then it is covered with the top jar;
- through the side openings from below and above, thermal energy is transferred by air convection, and the heated iron of the cans also gives off heat.
Pros:
- will not be extinguished by the wind;
- 100% that you will not suffocate with carbon monoxide, and when turned over, it is fireproof.
Of the shortcomings:
- in winter, it takes a long time to warm up the tent, but if you don’t scurry back and forth and don’t let out heat, then the thing is excellent.

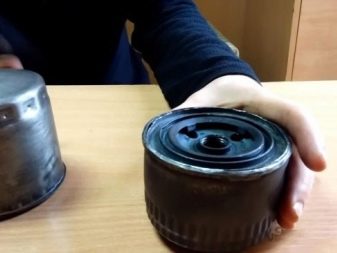
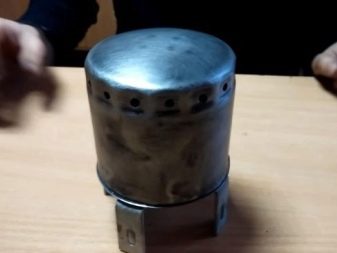
From the oil filter
It will require:
- oil filter from any car;
- electric drill and drills;
- M6 bolts with nuts - 4 pieces;
- iron corners - 4 pieces;
- a piece of galvanized steel;
- mark;
- pliers;
- metal scissors;
- dry fuel tablets;
- sharpening machine.
Step by step process.
Step 1
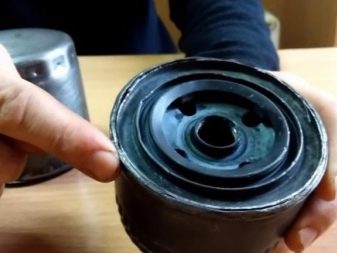
Automotive oil filters are short and long. It is better to take a long filter so that you can put more dry alcohol into it - this way the heating effect will increase. Remove all entrails from the filter. To do this, you need to disassemble it by grinding off the bent edge on a grinding machine.
Work must be done with the use of personal protective equipment and the implementation of safety measures, since sparks and metal will scatter in all directions.
Step 2
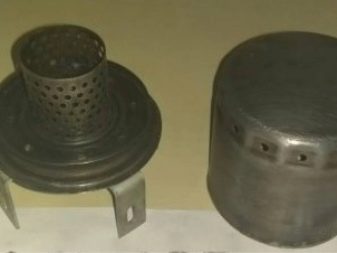
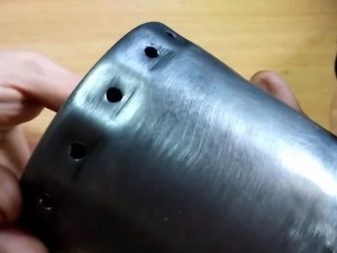
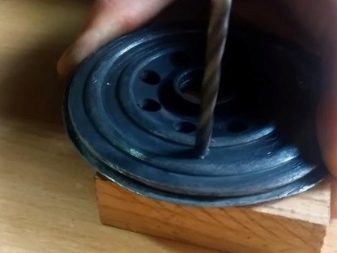
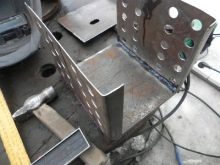
When all elements are removed, the filter is washed from oil. The advantage of assembling such a device is that the filter already contains all the necessary elements, they only need to be corrected.First we will make the case, it includes 2 parts: the bottom and the lid. The bottom at the initial stage is almost ready, it has holes for air intake and combustion support, you only need to make additional 4 holes for the M6 bolts and for the legs.
We make holes with an electric drill and an 8 mm metal drill. We mark the holes, core, and then drill. The drill must be lubricated, so its working edge will last longer and will not jam when drilling.
We make holes in the lid in the same order, only their number will be larger.
Step 3
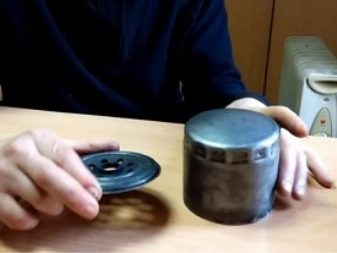
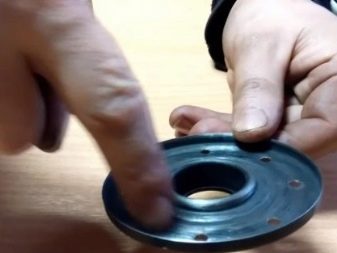
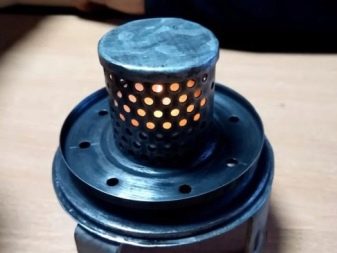
By and large, all the components of the heater are ready, it remains to make a cover on the grid and screw the legs. We construct the lid from a piece of galvanized sheet: using scissors for iron, we cut out a circle with a small margin under the side and bend the edges with pliers so that they fit snugly against the grid. Similarly, this part can be made by tapping the edges of the workpiece on a round timber of the desired diameter.
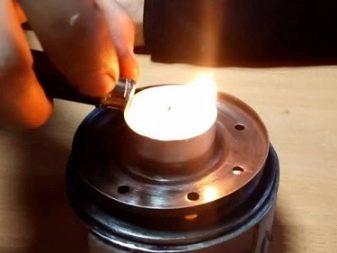
The lid is needed in order to cover the open flame of a candle or dry alcohol. There is a second bottom in the oil filter, only without holes, so they must be created in the same way as in the first one. A candle (dry alcohol) will be installed on it and covered with a mesh with a lid that we made earlier. We fasten the legs (from metal corners) to the bottom with four holes on the M6 bolts with nuts.
Step 4
Now all the elements for the heater are prepared, it remains to assemble them into one and test this home-made device in operation.We mount the second bottom on the bottom with legs to place a candle or dry alcohol on it, then we install a candle (dry alcohol), light it and cover it with a mesh with a small lid, then cover the whole device with a large lid-case. The device is ready.
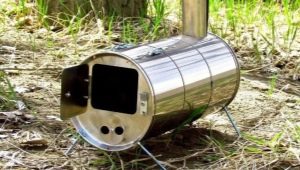
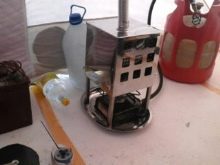
gas
The gas radiator is an iron case with metal tubes installed in the body of the case. At the bottom of the housing there is a hole for mounting the burner. In its upper part there is a specialized hole for installing a gas outlet pipe. On the side, if there is a fan, a hole for the air intake pipe from the street.
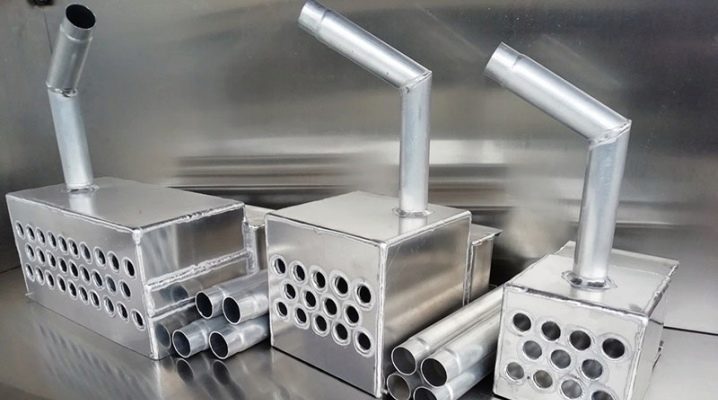
The manufacturing procedure is as follows:
- a sheet of metal with a thickness of 0.5-1.0 mm is taken and the body is marked in accordance with the sketch or drawing;
- by means of a tool, the sheet is bent with further electric welding or metal soldering;
- holes are made in the sides of the heat exchanger housing for mounting tubes;
- tubes are mounted (pre-prepared in size) and welding or soldering is performed, based on the material.
- in the upper part of the body, a component is welded for fastening the pipe required for the removal of exhaust gases;
- a component is welded on the side of the body to connect the air mass supply pipe;
- the final assembly of the heat exchanger is carried out with the sealing of all components;
- if there is a fan, then it is installed in the case with the supply cable connected to the battery;
- it is desirable to weld the stand under the heat exchanger with a device for adjusting the position of the structure.
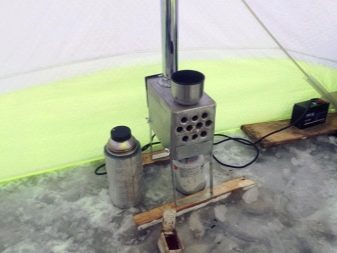
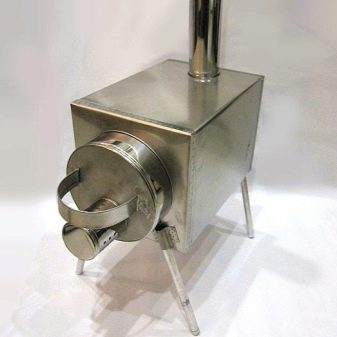
Furnace heating
There are no particular difficulties in creating a conventional heat exchanger for a tent with your own hands.For the manufacture of the stove, you will need some sheet metal 1 mm thick, pipes 20-30 mm in size with a thin wall for the radiator and a combined chimney pipe with a diameter of about 65-80 mm. To work, you will need a welding unit and simple locksmith tools, which are usually available in every garage.
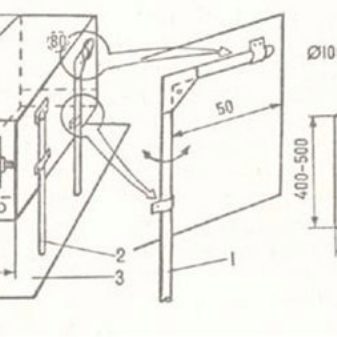
- Assembly. Having decided on the dimensions and drawing a sketch of the stove body, we make blanks for the front and rear walls. They need to drill holes for the pipes. It is desirable to place them in 3 tiers: 5 pieces in the lower and upper rows, and 4 in the middle. Welding is a responsible operation. Weld holes are not allowed, as the tube sheet isolates the furnace area from the tent room.
- Frame. According to the drawing, it is necessary to cut 4 walls from the sheet and weld them into place. Clean the welding seams and blunt the sharp edges on the metal using a grinder. The legs for the device can be made from the remnants of a sheet, making a corner of 15x15 or 20x20 mm, 17-20 cm long. Taking into account the need for delivery to the place, the legs should be made folding.
- Chimney. To install the chimney, a hole is cut out in the casing wall lying on top and a socket is welded. The chimney itself is assembled from separate pipes about 60 cm long. The total length of the chimney should be about 0.5 m above the roof of the tent. For the stable operation of the device, a fan must be placed on a lattice of tubes - computer coolers are often used for this. They are quite productive and operate almost inaudibly.
Fasteners must be welded to the case in suitable places and the cooler must be fixed with screws. It runs on battery.
How to make a heat exchanger for a winter tent with your own hands, see the following video.