Features of making a stove for a tent with your own hands
In summer, the presence of a stove in a tent for people leading a field lifestyle is optional, and from autumn to spring it is a severe necessity. Here it is important not only to cook, for example, porridge, but also to warm up. A sleeping bag and thermal underwear, a tent for winter conditions, of course, can help out, but sooner or later there will be a need to get out of the sleeping bag, which means the loss of heat accumulated with difficulty during lying.
When it is below -10 degrees outside, no insulation will help, as a person will freeze without additional heating. If there is no desire or opportunity to spend money on buying a finished potbelly stove, then it is easy to make such a stove with your own hands.
Requirements
A stove, including a home-made one, should be light, economical, even work on wood and coals, without forcing the tourist to buy alcohol, diesel fuel or other oil products or look for plastic garbage for burning, which gives a very caustic and smoky smoke.
Design
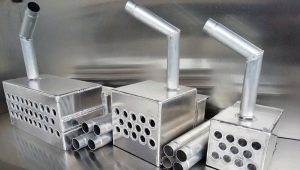
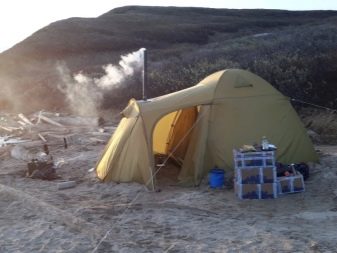
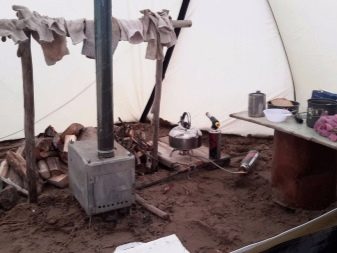
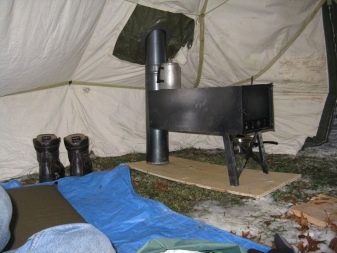
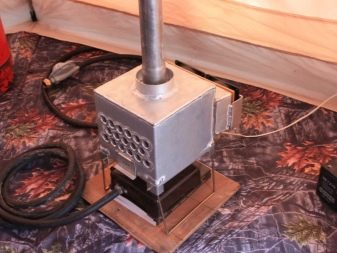
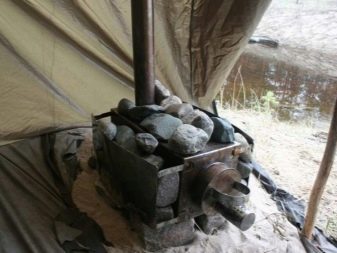
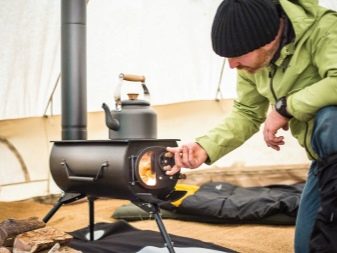
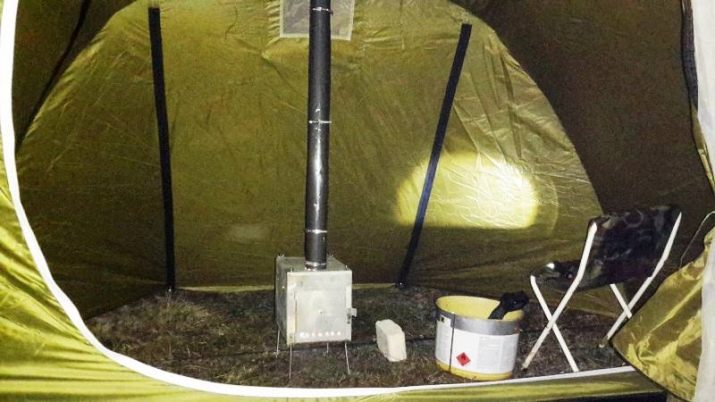
The main thing is that the structure must be made of metal. The best choice as the main material is fireproof stainless steel, which does not pollute the air in the tent with combustion products, which would lead to suffocation while sleeping. The best option is a stove with a chimney.The firebox must stand on legs and be on a heat-insulating stand.
A stove without a chimney will lead to the fact that the owner may burn out.
Spark suppression and efficiency
Optionally, a potbelly stove or a wood chipper can have a chimney-coil, in which the resulting sparks rising up have time to die out. If a hot spark falls on the roof of the tent, then a hole can be burned, which will call into question overnight stays and halts in case of sudden prolonged or heavy rain.
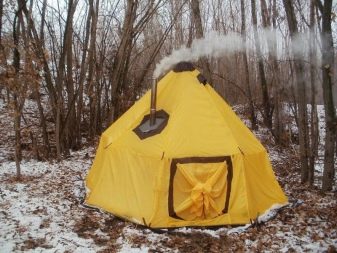
If there is no spark arrester in the design, then you need to install the pipe so that it does not go out through the roof of the tent (vertically), but through any of its walls (horizontally). In addition, a horizontal pipe significantly improves the heating of the air inside the shelter. This approach is especially relevant on frosty days, when every degree of precious heat counts.

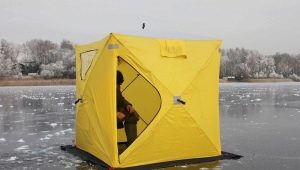
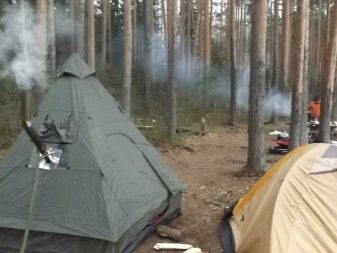
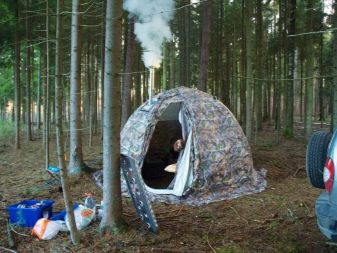
Tent
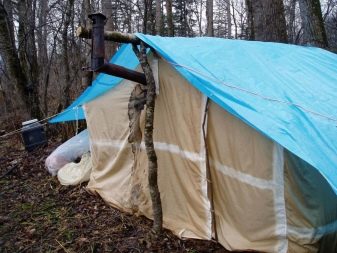
The ceiling, floor and walls of the tent must not support combustion. It is advisable to purchase a shelter that is resistant to temperature fluctuations during the day up to tens of degrees. For a chimney in the ceiling or one of the walls of the tent the outlet must be insulated with a heat-resistant insert, which will not deform the tent itself.
The design of the tent should have retractable openings or windows, which, if necessary, can be easily opened, allowing fresh air to pass inside - a small draft for confident smoldering of firewood in the stove is vital, otherwise the fire in the stove will go out and the occupant of the tent will lose heating.

The tent should be quite roomy so that the owner can comfortably spend the night with a warming stove, when his own heat is no longer warm, and at the same time there was no possibility to accidentally touch and overturn a working heating device in a dream.If in doubt, it is better to use alternative methods so as not to freeze your hands and feet. For example, you can put a heat accumulator in a sleeping bag.
How to assemble?
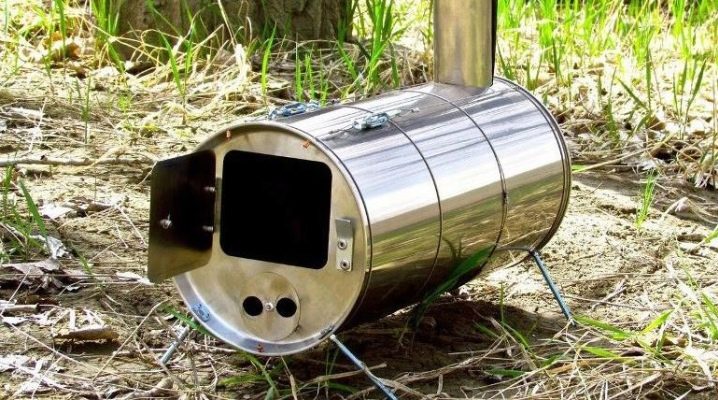
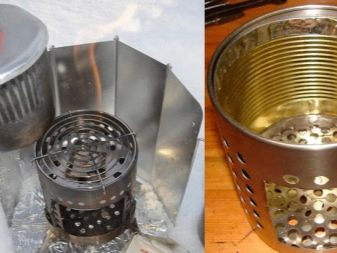
Homemade camping potbelly stove
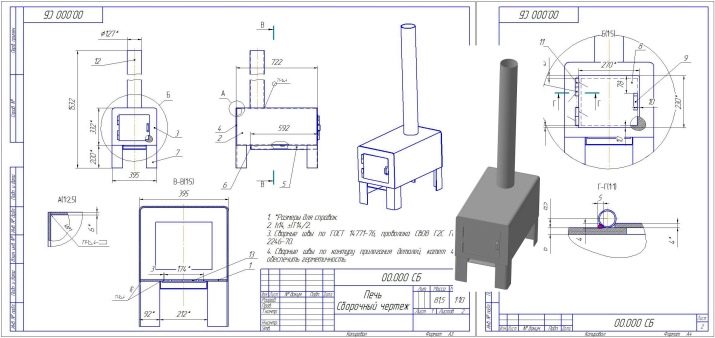
The classic wood-burning mini-potbelly stove is a firebox with an exhaust pipe, the end of which is brought outside the tent. You can make a “transformer” potbelly stove out of a simple woodchip stove by attaching a collapsible detachable chimney to it. You need to choose any of the available drawings, drawings and, if necessary, recalculate the dimensions of the elements of the entire structure to suit your needs. Thus, it is possible to repeat the chosen scheme in practice exactly.
wood chipper
To make a wood chip firebox, you must perform a series of steps described below.
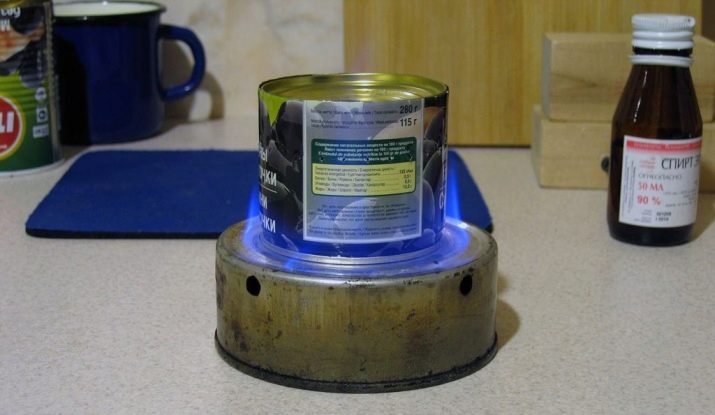
- You need to choose two tin cans with a diameter of 10 and a height of 6 cm. Basically, tourist mugs made of stainless steel have such dimensions, the diameter of which can reach 11 cm.
- Then you should bend the torn edges left after opening on both banks.
- Using any metal sheet, for example, a piece of roofing sheet, it is necessary to cut out a circle with a diameter of 30 mm with three long ends and bend these ends at a right angle.
- After that, holes with a diameter of 4 mm should be drilled at the bottom of the jar, referring to the ends bent on the circle.
- Then you need to lower the circle with bent ends to the bottom of the jar, while the ends must pass through the holes intended for them.
- Bend the ends and put dry fragments of branches, bark, wood chips on the circle.
- In the same inner jar, at a distance of 2 cm from the top edge, three holes with a diameter of 5 mm must be cut. The angular distance is equivalent to 120 degrees.
- Insert bolts with lock washers and tighten them with nuts.
- After that, you need to install the mug on the resulting design. If the mug is not level, then you will need to set the bolts.
- Make additional holes in the bottom of the can for the supports on which it will stand, while the length of each of the legs should not be more than the diameter of the can.
- Then you need to make a lid for the already assembled structure from the second can. To do this, you need to cut it, indent from both edges and bend it a little - this will allow it to enter the structure based on the first can with some effort.
- Use the connector from the battery charger for the pen. Attach it to the center of the lid.
- Drill 5 mm holes in the bottom of the resulting stove to create a small draft - you will need several of them.
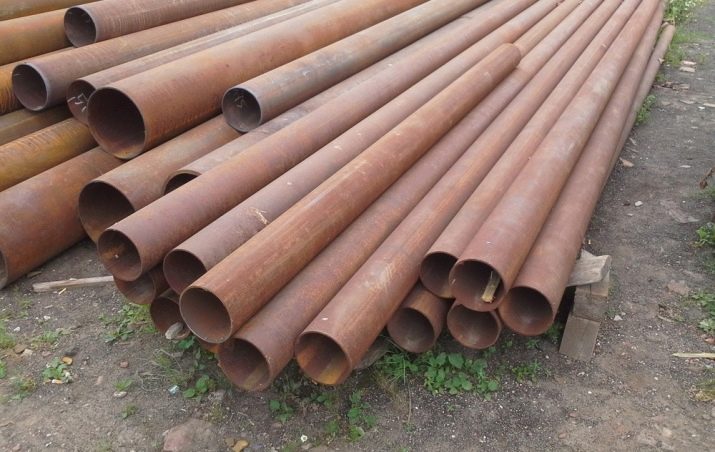
Chimney
First of all, you need to purchase a thin-walled steel pipe (for any tent, a length of 2.5 m is enough) - this will allow you to make a removable chimney. For the manufacture of a chimney, it is better to follow the recommendations presented below.
- It is necessary to cut the pipe into sections, for example, half a meter.
- In order for one section to fit into another, you need to cut one of the ends of each section in the form of a “fringe” (cut petals). Slightly fold these petals inward.
Now one section of the pipe fits easily into another.
smoke extractor
This device will require a metal funnel (hilo or smoke box), which is also easy to make from a sheet of thin-walled steel.
- First you need to mark a reference point on the steel sheet, around which the sheet itself will bend.
- Then roll it into a cone and secure it with rivets or bolts and nuts in two or three places.
- Cut off the top of the resulting structure so that the cross section matches the diameter of the chimney.
- Cut off excess metal on the opposite (wide) edge of the resulting funnel so that its diameter completely coincides with the diameter of the lid.
- Bend and finish both edges (larger and smaller) of the funnel in such a way that the structure is securely and tightly put on the wood chip.
- Assemble and insert the chimney into the smoke box, bring it out through the regular window of the tent.
- Provide micro-ventilation in the tent by lowering the fasteners on the windows and doors.
- Light a fire in the stove and install the resulting smoke hood on it - this can be fenced off from the combustion products of wood.
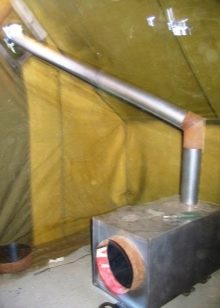

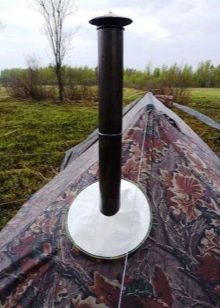
Now the smoke will go outside the tent. The firebox and hood will heat up, creating a heat source inside the tent. Before cooking on a wood chipper, you will need to disconnect the chimney from the stove itself by removing the smoke box, and ensure an active flow of fresh air in the tent by fully opening the windows.
Dimensions
If the tent is four-seater, and several people participate in the campaign, then a second wood chipper is built in the vestibule for cooking food (possibly with a chimney). To heat the main sleeping room, either the same wood chip with the same chimney, or a full-size (standard) potbelly stove, is used. When placing this or that stove in a tent, you need to protect your “tent” from overheating and sudden ignition, and yourself from intoxication.
For winter fishing and all-weather trips, it is advisable to use a full-sized potbelly stove, often installed at the entrance to the tent. A standard potbelly stove is equipped with a blower (grate) - this makes it easier to lay firewood. In the case of wood chips, the chimney is removed each time wood is added to the firebox.
Gas-burners
If in the area where the person goes, it is impossible to quickly find "long-playing" wood (for example, acacia), then you should take care of gas burners and spirit lamps. They will help to prepare porridge or soup. Making a gas stove is much more difficult - you need to get an industrial burner and a cylinder of liquefied gas.
The disadvantage of gas equipment is the need to leave the cylinder outside - at the slightest etching through a worn valve, a person risks suffocation, since propane is heavier than air, and it easily accumulates in the lower part of the tent to a concentration dangerous for human life. A gas burner is relatively safe to use outside of a tent.
How to make a stove for a tent with your own hands, see the following video.