How to properly fold a tent?
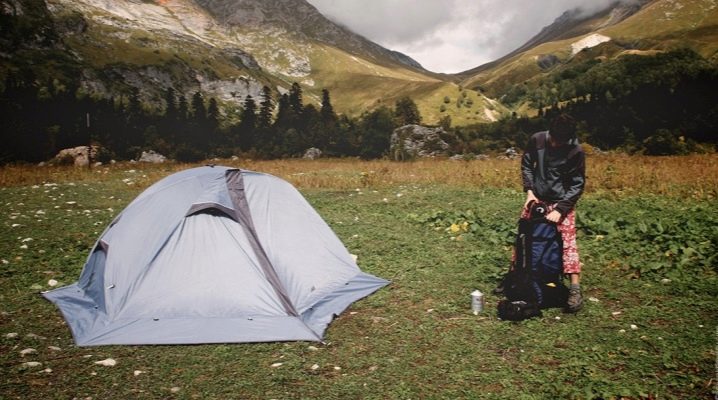
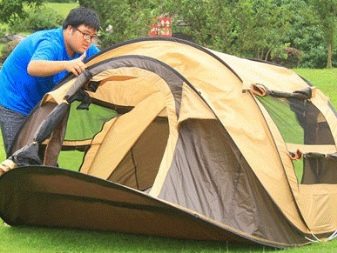
Outdoor recreation has gained immense popularity. The population, tired of the bustle of the city, tends to spend a few days with friends or family in the forest or on the banks of the river. For such a trip, you must have provisions, fishing gear (optional) and camping equipment, the main element of which is a tent. It must be able to install, and then disassemble and fold.
How to disassemble?
In order to have an idea about the order of assembly and disassembly of tents, one should have initial knowledge of their designs, types and purpose.
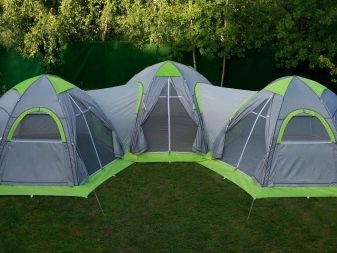
Tents can be divided into several basic types.
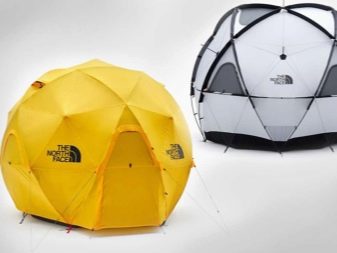
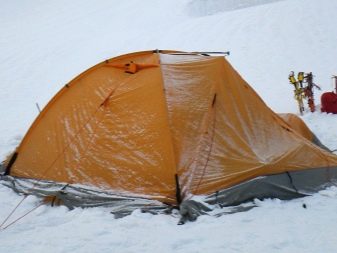
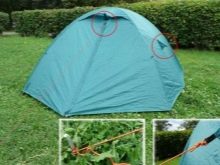
- Tents made in the form of a dome or sphere. They are very good when used in bad weather, such as when it's raining and windy outside. However, their weight is quite impressive due to the frame arcs - it can reach 5-6 kg.
- Structures having a cylindrical shape are less stable samples. But these tents are much more spacious than other options. They are also called tunnels.
- There are very strong, designed for long trips, storm tents.
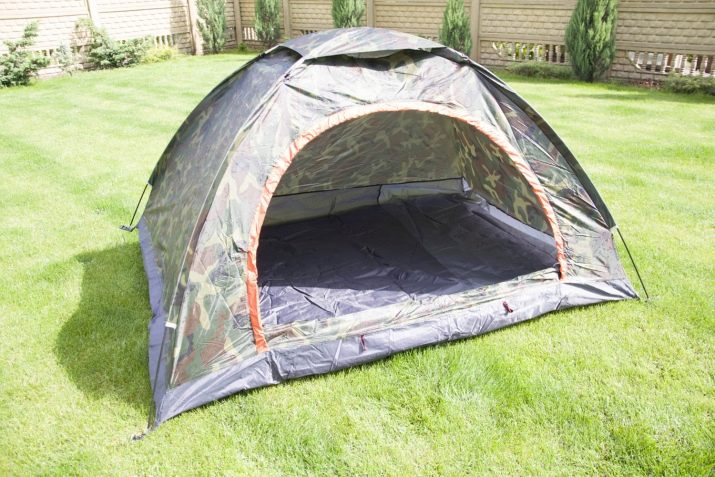
- The most common type is the hip tent. It weighs 3.5-4 kg and is most often used for trips to nature.
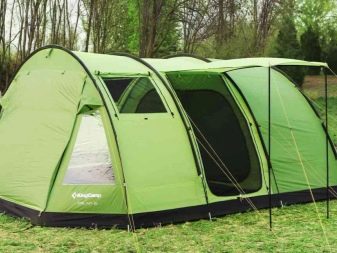
Usually it is a frame structure that is installed on the central stakes and stretched using struts.
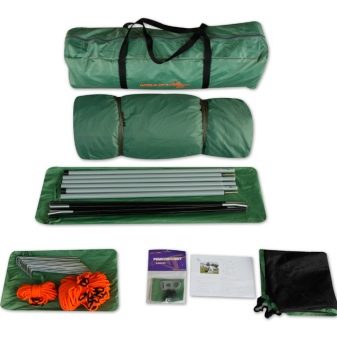
You need to assemble the tent in such a way that as a result of all the actions you get a bundle that can be placed in a cover. The principle of dismantling all types of tents is almost the same.
An ordinary two-layer tourist tent with a frame made of fiberglass should be disassembled according to the principle described below.
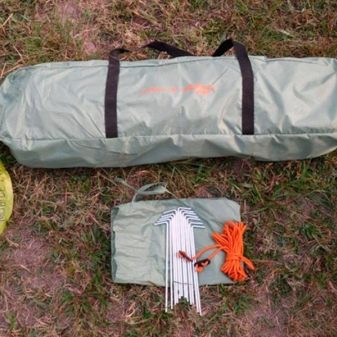
- At the very beginning, you need to go around the tent and use your hands to pull out all the pegs that hold the guys (struts). After that, all the ropes should be folded compactly. You can bend each of them two or three times and tighten it into a knot that unties spontaneously. Removed pegs should be placed in a small bag.
- After that, all available locks are fastened at the entrances, and the top awning of the tent is disconnected. It must be dried, as condensation will always collect on the inside. It is recommended to put the removed awning somewhere near the tent, turning it over to the back side.
If there is no opportunity or time to dry the tent, then this should be done upon returning home, since wet tent material can become covered with fungus and rot over time.
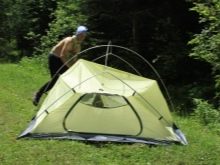
The frame tent can be with external and internal arcs.
If the arcs are internal, then you must first check the tent. Make sure there are no items in it. Then it is necessary to remove the arcs of the frame, after which they should be disassembled and hidden in a case. It may or may not be included.
When the frame arches stretch the awning along the outer side, then, first of all, the inner tent part is removed. Similarly, frame arcs are removed from the awning.Their ends are removed from the eyelets, and all existing latches are disconnected. After that, the arcs are disassembled and folded into a case.
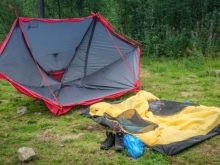
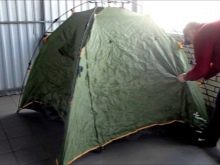
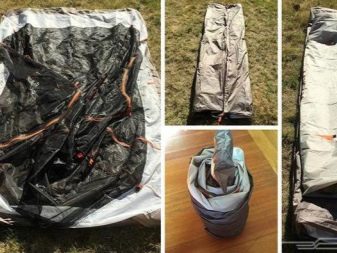
Both tent layers are laid out on the ground for their further folding.

How to fold?
To fold the disassembled tent into a round case, you must first read the attached instructions. Some types of tents are folded along, while others are rolled in a transverse way. The end result will depend on this.
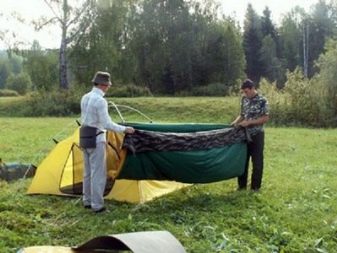
It is best to carry out the process of disassembling and packing the tent not alone, but with a partner.
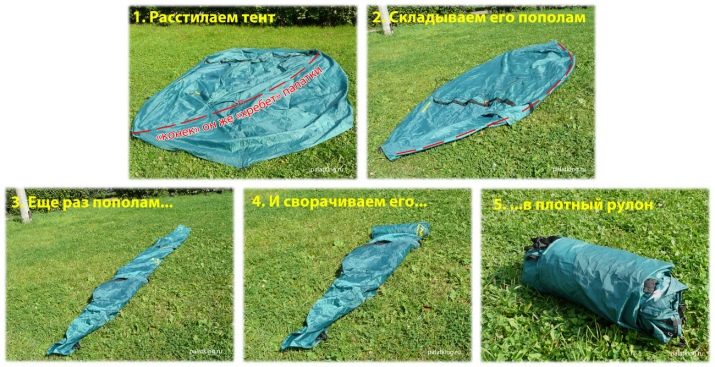
The elementary scheme includes several steps.
- After the tent has been divided into layers, on a flat surface (grass or ground) its outer part (awning) is spread and folded in half. The bent part should run along the vestibule.
- Then the ends of the vestibule are bent towards the center. Thus, a rectangular or square shape is obtained.
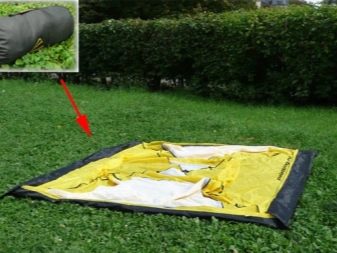
- This rectangle must be folded in half. The result is a long rectangular shape of a smaller size. The entire length is visually divided into three equal segments, and the lateral ends are once again wrapped inward. The rectangle will be folded three times already.
- Similarly, you need to do with the inside of the tent: first it is folded in half, and then folded in three.
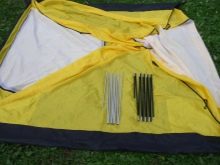
- Both folded awnings must be placed on top of each other. Packed arcs and pegs are placed on them.
- Everything rolls together like a track, tightly into a roll, after which it is fixed with a rope or braid.
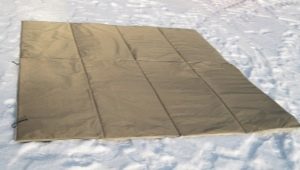
- The last step is to pack the resulting bundle into a round case.

If everything is done correctly, then the tent will fit into it without much difficulty.
You can use another method.
The inner layer of the tent can be laid on top of the outer one, after which two layers can be folded in half. By analogy, the ends of the vestibule are bent towards the center, and another elongated rectangle is obtained, which is folded three times again.
The long side of the two layers of the tent should be wrapped very tightly into a roll shape. The resulting bundle should fit in a round case. After the tent is laid, arcs and stakes are placed on top. The cover is tied with a rope.
Automatic tent
In the last decade, a self-folding tent has appeared on sale, which tourists and fishermen willingly purchase. Their distinguishing feature compared to other types of tents is their light weight. When folded, the tent fits easily into a backpack, which is worn behind the back of an outdoor enthusiast.
The market includes products of domestic and foreign manufacturers, but the leading position is occupied by travel equipment made in China.
It is produced with different dimensions, but most often the size differs by 7-10 cm from the one indicated on the package.
These designs are purchased more often than others because of the low price and ease of installation.
Very often, an automatic tent is bought by anglers for winter fishing. At the bottom there is a zippered opening for the hole, so you can set up a tent in the winter on the ice not near the place of fishing, but directly above it.
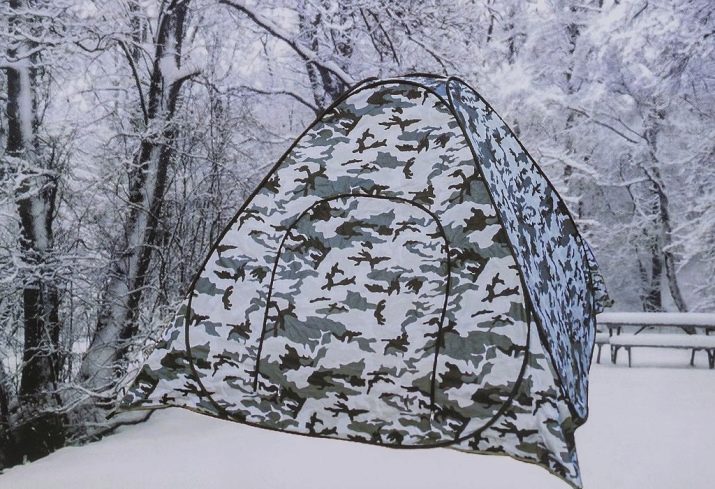
Any automatic design is made of springy steel. Outside it is lined with material (polyester).
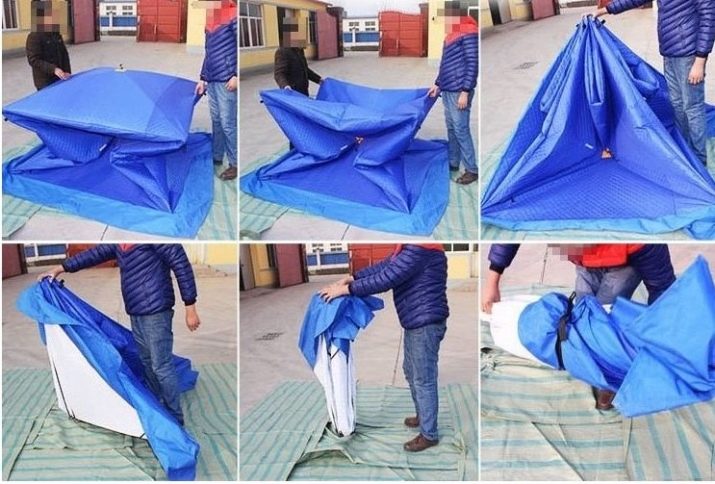
The assembly process includes the steps described below.
- After rest, the automatic tent must be freed from objects.
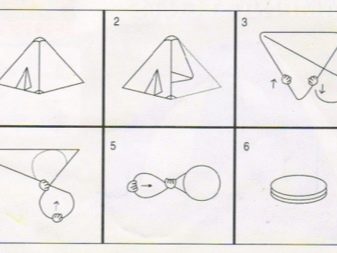
- At the very beginning, you need to fasten all the zippers.Then the tent is folded in half, and the bottom (inner part) is removed under the outer awning - a triangle is obtained, resembling a zippered wallet. The top of such a triangle is the top of the equipment, and the side parts fall to the bottom.
- With your left hand, you need to take the top, and with your right hand, fix one of the sides from below, after which you need to bring your hands together and pull both sides to the center. An automatic device should work - the steel arcs themselves begin to twist into a figure eight. It remains only with two hands to help the tent fold, screw it into this shape, after which it will turn into a circle. Thus, the tent will be folded. Then you should send it to the case and carefully tuck in the hanging sections of the fabric, if any.
A winter fishing tent, which is also square, folds in the same way as a triangular sample.
Diagonally, you need to pull the corners of the tent to the center - the result is a square shape. The left hand should take the upper diagonal end of the fabric, and the right hand should be focused on the upper right corner.
After that, circular movements are carried out with the hands. The left hand should turn away from you, and the right hand towards you. The tent is twisted into a figure-eight and a circle, which easily fits into the cover.
Children's
Any tent for a child differs in its design from equipment for adults. It may contain tunnels, several entrances, it may be square or triangular in shape and, of course, have a variegated color.
Sellers should acquaint buyers with the installation and assembly methods of children's camping structures of various shapes.
It is better to assemble and disassemble them, having previously prepared.You can do this at home, and not the first time on a hike - this approach will help to gain experience and confidence that children, for example, will not be left without their own place to sleep if their father fails to set up a tent for any reason .
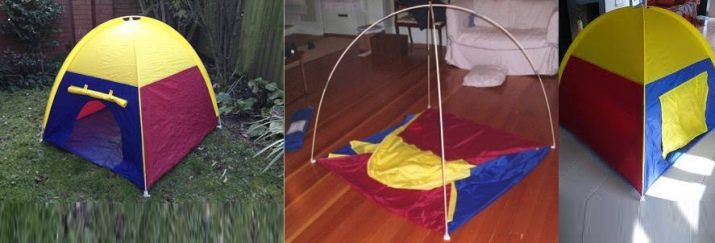
A square or rectangular children's tent in the shape of a house can be folded in two simple ways, which are described below.
- You need to stand in front of any one wall of the tent (house), which looks like a square. You need to take hold of its edges with your hands, while the tent should stand on the side edge so that its top looks forward, and to the person it should be turned upside down. The right hand must be moved towards the left, lifting it above the other hand. When the hands approach, the tent frame will begin to curl into a figure eight. The result should be rings that are fixed on top of each other. After that, children's automatic equipment fits into the case very easily.
- It is used to assemble a tent in the event that it was not possible to roll a square tent into a figure-eight shape.
In this situation, the walls are folded first. The bottom is lifted up with the right hand. With your left hand, you need to take hold of the side rib, and then press the side part to the raised bottom of the tent, that is, wrap it in a ring towards the bottom.
The second tent side part is pressed against the formed ring. The circle is closed. The tent is ready to be placed in the bag.
Children's Chinese automatic tent in the shape of a triangle is assembled according to a different scheme.
- One of the three ribs should be pushed away from you towards the inside of the tent.The fixing elastic should not be tucked into the middle of the hiking equipment.
- When the rib is tucked inward, the tent folds into a triangle. With one hand, you need to take hold of the top of the triangle and start turning it around the axis - the tent automatically folds in the 8th and takes the shape of a circle. The resulting circle is fixed with an elastic band and sent to the case.


Tourist
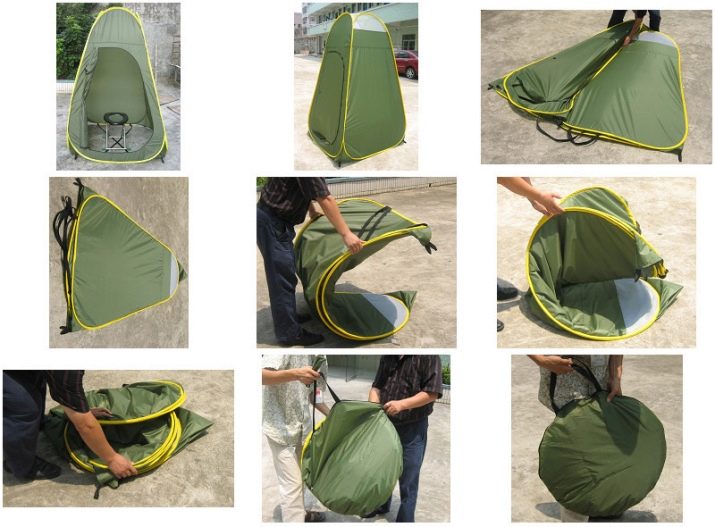
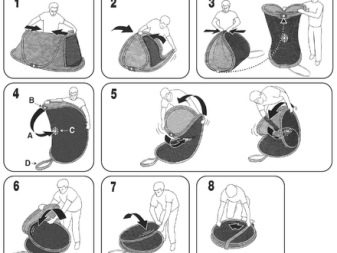
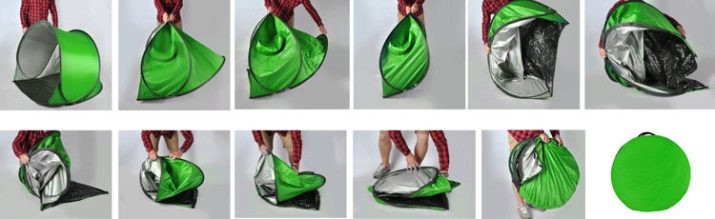
An automatic hiking product for tourists is folded according to a certain algorithm.
It can be of any shape - basically it is a square, rectangle or triangle. What form of camping equipment does not really matter.
- You should take it with both hands by parallel edges and bring your hands together, thereby folding the entire tent together like a book. It turns out a flat figure of a certain shape.
- The tent itself must be placed on its base. For example, with a triangular shape of tourist equipment, its two sides will be on the ground, and the top will remain at the top.
- Then you need to pull the top of the tent down towards the base, and hold it with your foot so that it does not move. With both hands you need to roll the tent into a roll. The automatic tent corners at the base will begin to rise and roll into a circle. With a little effort, you can speed up this process. The tent will take the form of a flat circle that will easily fit into the cover.
Features of the "eight" scheme
Fans of winter fishing with a large assortment of tourist equipment prefer inexpensive but practical Chinese-made tents. This product is easy to fold and assemble. It is called "Chinese Eight".This fishing tent is made of waterproof fabric that can withstand the onslaught of winter precipitation. With sub-zero temperatures outside, every fisherman seeks to install and disassemble it quickly.
The figure-eight method has become widespread and is loved by many travelers for its optimality and simplicity.
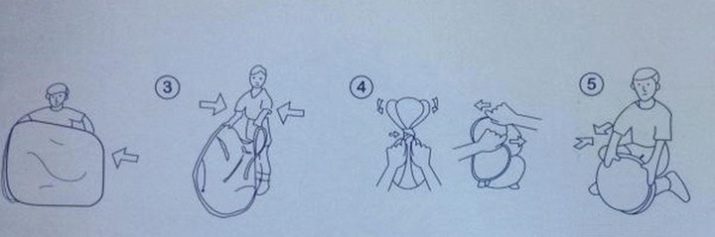
- It is necessary, first of all, to put the product in a vertical position. All snakes and clips are unfastened so that air comes out of its inner part.
- If the tent is quadrangular or triangular, then you should select one of the faces and forcefully push it to the opposite. Thus, the tent will fold into a large triangle. The hanging fabric is tucked in.
- The peculiarity of collecting a fishing tent is that it must be placed upside down. You need to step on the top with your foot. Both upper faces are taken by hand and carefully lowered down to the point where the foot stands. A newly lowered fabric is placed under it. It turns out a kind of tent clamp in the middle, and ribs rise on the sides.
- It is necessary to take hold of these edges (ribs) with your hands and try to move them back, and then towards yourself, turning 180 degrees and thereby rolling the tent into a roll. The machine will work, and the arcs themselves will begin to bend. One of the hands holding the bending tent rib should be above the other, while both sides overlap each other, forming into a round ring. Camping equipment is assembled, it remains only to place it in a case.

An important nuance is training - you need to learn how to fold equipment at home. After the person began to twist it into a roll, you need to put one hand with the tent rib under the other in time.In this case, the success of the correct collection is guaranteed.
You can fold the same tent a little differently - according to a different scheme.
- As in the first case, the ribs are assembled into a flat sheet. To do this, you need to push one of the faces to the opposite side.
- The tent window turns to the opposite side.
- The two upper faces are attracted to the lower base, after which you need to step with your foot on the point of their connection. The same ribs are formed on the sides as in the situation described above.
- Then you need to take hold of each side fender with your hands and pull them down to the tent fold point, held by your foot. In this case, one hand with a tent canvas should be brought under the other, overlapping and wrapping these edges with a scarf.
- After they are connected, one hand is released, and the second continues to hold the side faces together. Visually, it looks like a triangle, the top of which is fixed by the hand, while the rest of the fabric hangs over the point where the leg is located.
With your free hand, you need to fill the tent canvas, moving it away from you inward, into the space between the bottom point and the top. The camping structure will immediately fold into a circle, which can be placed in a case.
For information on how to properly fold an automatic winter tent (eight), see the following video.