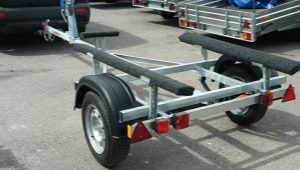
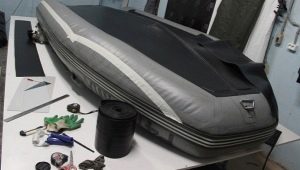
Do-it-yourself PVC boat tuning features
After purchasing a PVC boat, at one fine moment, any owner begins to think about improving the technical and functional characteristics of the watercraft. Tuning can be ordered from reliable specialists who, for payment, will be able to fulfill all the wishes of the customer.
But the process of self-performing an upgrade is especially interesting, which will not only improve the characteristics of a swimming facility, but also bring a lot of positive feelings.
Why is modernization needed?
Similar measures for the modernization of a swimming facility make it possible to eliminate the financial costs of acquiring a new boat. It is possible to modify the appearance and technical capabilities (for example, improving driving performance) of an existing watercraft at home.
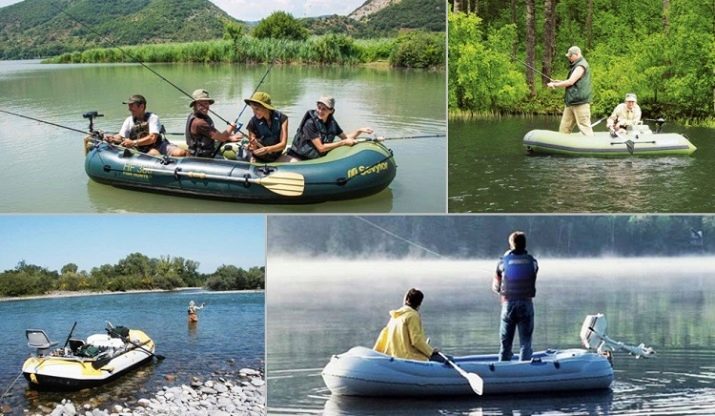
Do-it-yourself PVC boat tuning for fishing allows you to improve the safety of a person on this vessel in the process of fishing, and also makes it possible to extend the life of the boat.
In order to improve these options, the following actions are taken:
- put a parking anchor;
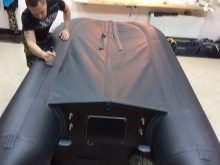
- equip the boat with a protective canopy;
- improve the angler's chair;
- equip the craft with all kinds of bags for keeping small things important for fishing;
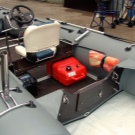
- set up a camping table;
- build a similar ladder;
- install a gasoline or electric engine;
- install hydrofoils;
- make a sail;
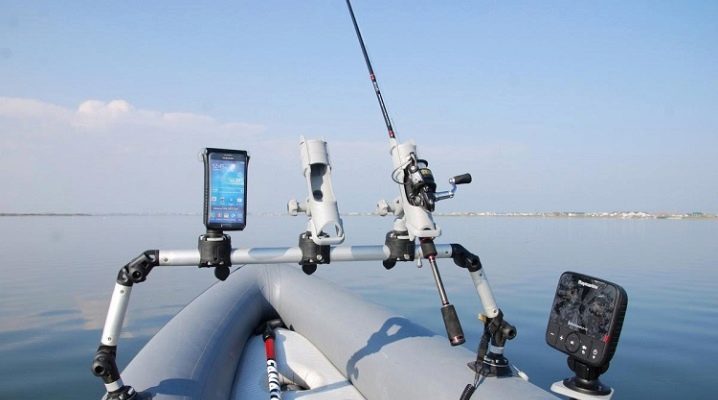
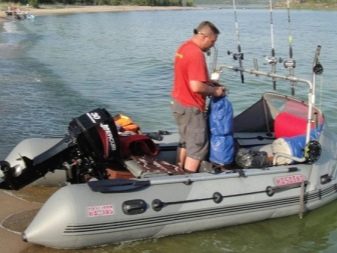
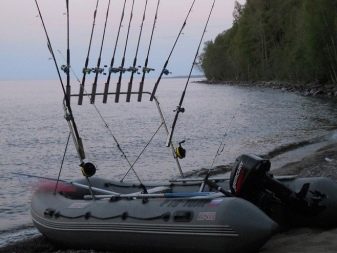
- install mounts for a gas tank, echo sounder and rods;
- mount specialized pumps for boats.
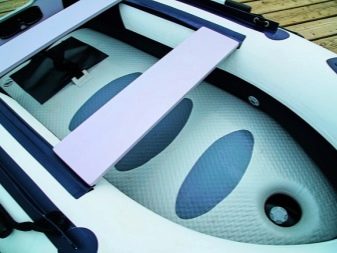
All these renovations provide an opportunity to raise the level of comfort and safety of the fisherman. The owner has the opportunity to strengthen the bottom of the craft, make a hard floor, improve the degree of protection of the sides from mechanical damage, install clamps for additional safety ropes, cables, and the like.
Structural reinforcement
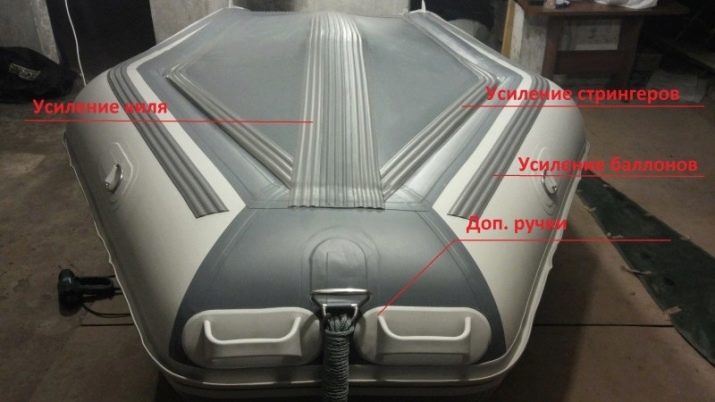
There is an opinion that strengthening the construction of a boat made of polyvinyl chloride, which implies an increase in the strength of its bottom and the lower region of the cylinders (side walls, sidewalls), is performed only if it is operated in emergency conditions. But seasoned fishing enthusiasts carry out such tuning all the time, regardless of fishing conditions - on rapids or in a quiet body of water. Sometimes on a well-known, at first glance, reservoir, you can run into the same snag, which did not attract attention before. In other words, the threat of damage to a fishing boat is constantly quite high.
In addition, it is desirable to harden the bottom and cylinders of a boat made of polyvinyl chloride in order to increase the carrying capacity of structural components (more thorough fixation of the motor and for other purposes). Let us consider in more detail the strengthening of the structural elements of the boat.
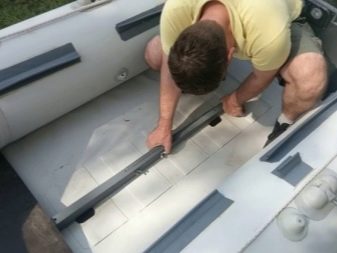
bottom
The sequence of operations is shown below.
- The boat is inflated and capsized upside down.
- The surface is cleaned (provided that the swimming facility has already been used). Basically, anglers are content with washing it, after which the additionally processed place is wiped with a rag.
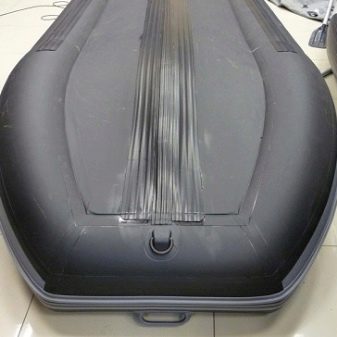
- Dimensioning is in progress. Here it is necessary to follow the principle of sufficiency, taking as a basis the dimensions of the vessel and the specifics of its operation. Some fishing enthusiasts glue parallel strips of ready-made PVC profiles (or rubberized fabric) to the bottom, while others fix a patch (membrane) or individual fragments of waterproof materials over its entire area. One way or another, the wear resistance and reliability of the bottom of the watercraft (at break) increase significantly.
- The required segments are created according to the measurements taken.
- The air from the boat is driven, and it is placed in a place prepared in advance. Since during the gluing of the membrane (or cut out strips) they will need to be smoothed out, fixing them on the base, the plane must be smooth and solid.
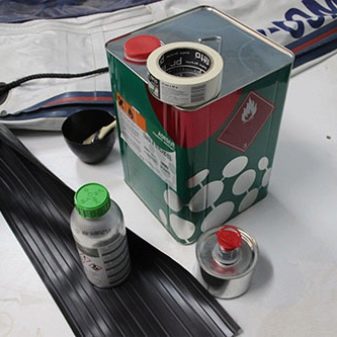
- Boat degreasing. At this stage, first of all, (if necessary) the removal of the smallest solid fractions from its bottom is carried out, and after that it is treated with a suitable agent that should not react with materials (watercraft and taken for sizing). Usually, gasoline or white spirit is used for degreasing. When there is nothing nearby, in addition to the solvent, then it is also allowed. Only carefully, in limited doses.
- Laying the cut parts, their alignment on the bottom. This is just an example. It will immediately be seen whether everything was done correctly during the preparatory work.Maybe the cut will need to be corrected.
- Applying glue in the required areas, and again - on top of the membrane or strip.
- Next - heating the area where the materials are applied with a building hair dryer with their further rolling with a hard and at the same time quite flexible roller. To perform heat treatment or not, is determined by the type of adhesive. However, it is necessary to press it (you can use a handicraft "skating rink", which can be done simply, or take a glass bottle for this). Close attention is to the elimination of air from under the glued material. Otherwise, in areas where bubbles form, the material will gradually move away. Therefore, with a slight hook, it will come off without much effort.
It must be taken into account that such tuning significantly increases the weight of the PVC boat. If the membrane is glued all over the bottom, then the smallest kilogram is 7-8. Experienced anglers recommend paying attention only to areas that are particularly exposed to wear. In such a situation, one speaks of "incomplete booking". Otherwise, tuning is carried out only on some sectors of the craft. Glue is applied in at least 2 layers. The first, after 10-15 minutes - the second. This increases the quality of fixation of the applied element based on polyvinyl chloride.
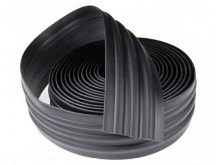
Reinforcement of the bottom and other structural elements of the craft can be conveniently performed with a specialized tape, which is called a profile or bulwark (fender). It is realized with a thickness of 0.1 to 0.3 centimeters and a width of 6 to 24 centimeters. Such elements are fixed with a 2-component adhesive composition. They are produced in 2 versions - a bulwark with a chipper and a regular one. There are plenty to choose from.

Cylinders
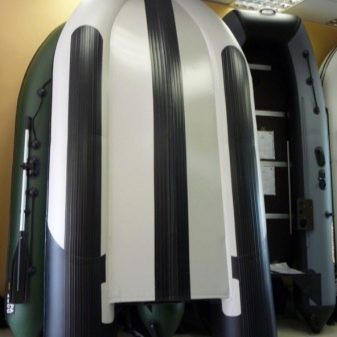
The process of strengthening cylinders is basically identical to the above technology. The only difference is that the float does not need to be blown off. The same PVC halts are used. As already noted, they have different linear parameters and are commercially available, as a rule, for the dimensions of a certain PVC boat modification, but it doesn’t matter.
Reinforcement of the cylinders guarantees additional protection and counteracts wear during operation.
keel
The keel is reinforced in the same way as the bottom itself - an additional layer of bulwark is glued on top of the tape, which the boat is often equipped with at the factory. There are no sophistications and features in this case. We take 2-component glue and paste over the largest area of \u200b\u200bthe keel with it.
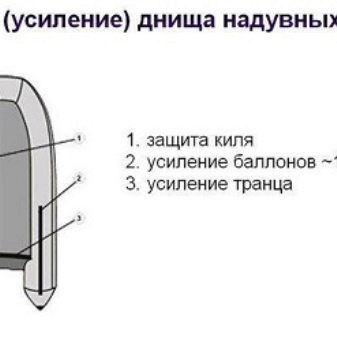
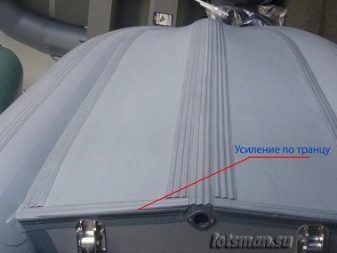
transom
For this part of the boat, reinforcement is simply necessary, because the transom is protected by just one layer of PVC fabric. In order not to toil with individual parts, the bottom of the floating facility can be sealed entirely using a fender. If you are careful, as well as choose the right glue, then the procedure can be implemented on your own.
This method will solve enough problems associated with a decrease in the characteristics of the craft.

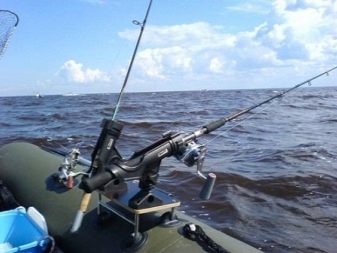
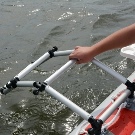
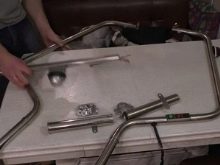
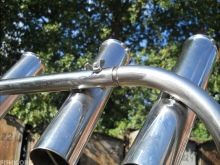
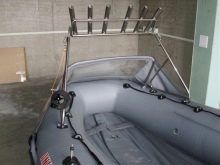
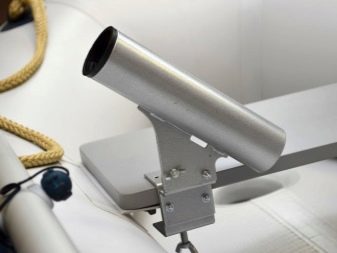
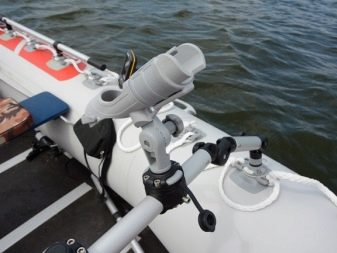
Targa making
For boats made of PVC, there will be a targa equipped with a number of glasses, or a holder on a clamp. The procedure for creating a targa consists of several steps.
- You need to take a plastic or iron tube, the diameter of which will be 0.7-1 cm larger than the diameter of the fishing rod. From it it is necessary to bend the arc in the width of the boat.
- On both sides, the tube must be flattened and holes drilled for the mounting bolts.
- Part of the tube must be cut into glasses, from one edge of which plugs must be welded.
- The glasses are fixed by welding on an arc for trolling.
- In conclusion, the entire device is treated with sandpaper and waterproof paint is applied.
Creating a holder like a clamp:
- you can make a clamp from an old meat grinder by cutting off the upper part from it;
- after that, you need to drill several holes in the body of the meat grinder, which will play the role of holder racks;
- 3 holes must be drilled in the tube, the third should be in the upper area;
- a rack made of a clamp and a flattened tube must be connected with bolts and washers;
- in the hole located at the top, it is necessary to fix the plumbing clamp.
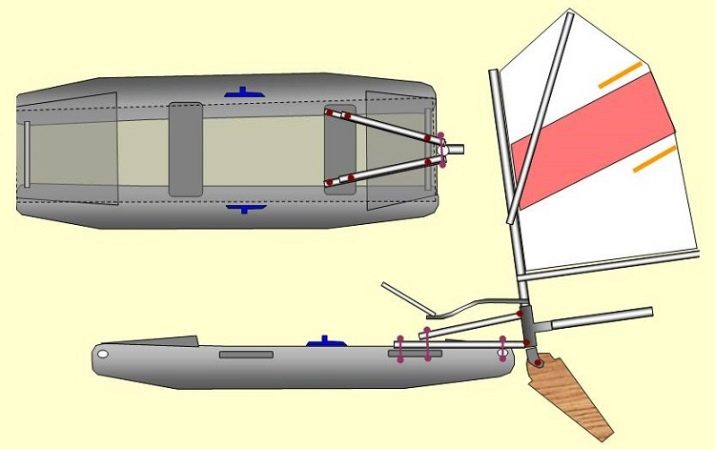
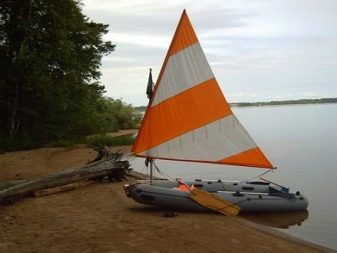
Setting the sail
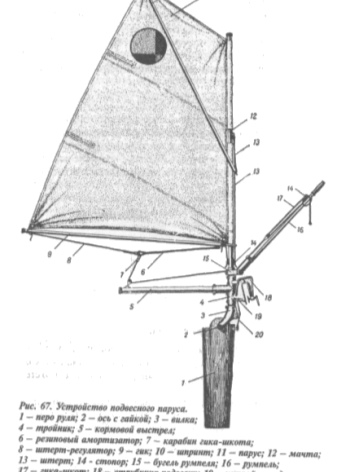
A PVC boat (even a small one, for example, with dimensions of 2200x1000 mm) can also be converted into a sailboat. It is not possible to install a standard-type mast on it, therefore they use sailing weapons that resemble Latin ones. Gear is missing. The mast (see drawings) includes a base cross tube (15), 2 tubes (7) - actually masts - and a yardarm (4).
The base tube with a diameter of 25-30 mm must be inserted into the oarlocks (14). Then, to its ends, fix the lower ends of the pipes (7) of the twin mast in the shape of the letter “L” with M5 bolts (13), and connect the upper ends of the pipes to each other and to the yardarm by means of a bolt (16) and a nut (17). The diameter of the pipes that form the yard and mast is 15 mm, and they can be made from duralumin ski poles.
The yard can be made detachable, in addition, the 200 mm connecting pipe (5) can be conveniently installed exactly at the place where the yard is assembled with the mast.
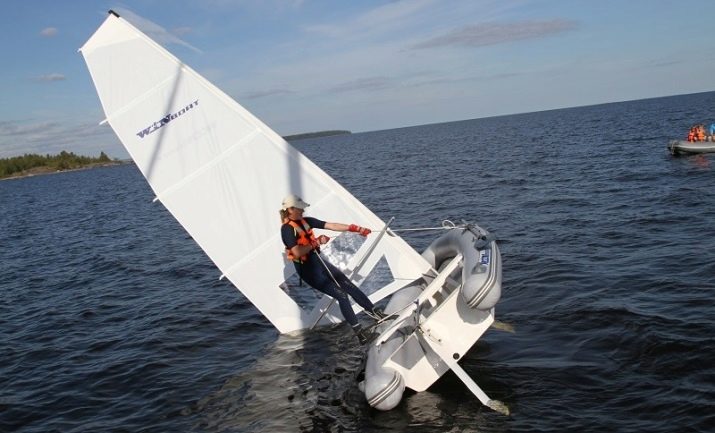
In the upper part of the yard we put a block (6) for the rope (cable); with its bottom, the yard is fixed to a rubber loop (2) on the bow of the vessel by means of a bracket (3).The loop is a circle made of 5 mm technical rubber with a diameter of 60 mm; the bottom of the circle is glued to the body (1) of the craft, and a hole is made for the earlobe in the upper part of the freely folding half.
The yard should have a slope of 60°. The dimensions of the pipes depend on the length of the craft. Having determined the area of fixation of the yardarm to the hull on the bow of the vessel, measure the distance (a) to the base tube passed through the oarlocks. After that, you can calculate the length of the mast pipes using the formula:
L (masts) \u003d (√ a * + (b2\4)) + 100 millimeters, where b is the distance between the oarlocks along the base tube.
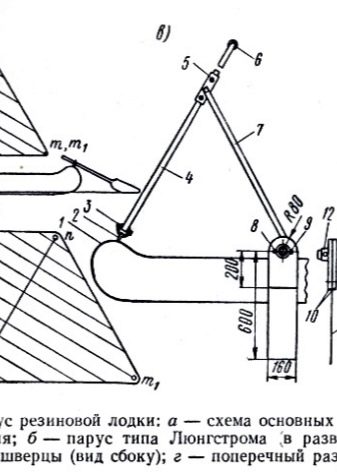
The length of the rail depends on the chosen centering. With a centering of 10%, the yard length can be calculated using the formula L (yard) = 1.8 a. The fixation point of the yard to the mast is located at a distance (a) from its bottom.
The screws (11) are made of 3 mm duralumin and are strung on the ends of the base tube that extend beyond the watercraft's cylinders. Cheek pads (10), made of 10 mm board or plywood, add strength to the screws and limit their angle of rotation to the diametrical plane. The location of the screws along the length of the base pipe is fixed by rings (12) threaded onto it from a tube with a large diameter; the rings are locked with bolts (8) and M5 nuts (9).
The sail is a triangle having equal sides, the head angle (top) of which is shifted to the bow in relation to the axis of the base tube by the value C= (6÷12%) L (leech). The length of each of the luffs L (leech) = 1.7 a. It is handy to use the Lungstrom sail, which makes it possible to double the sail area on full courses.On the outer side of the fold, a lick-rope is sewn along the leading edge, ropes or rings are fixed to it. They fix the sail.
In all 4 corners of the sail there are rings (eyelets). The cables are led into the ring of the lower rear corner of the sail, and the same bracket is used to fix the lower windward corner of the sail, connecting the bottom of the yard with a rubber loop.
The role of the steering wheel is played by an oar passed through a rubber oarlock fixed in the rear of the hull.
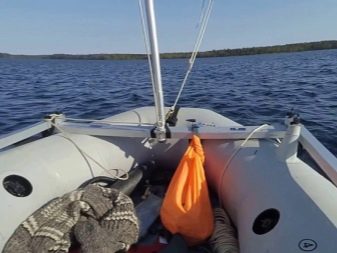
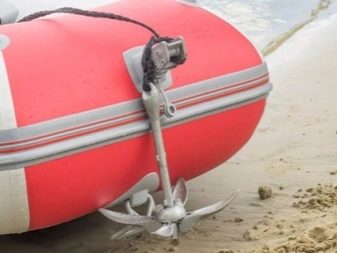
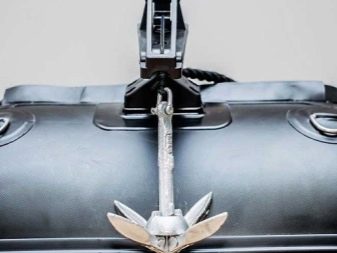
Anchor fastening
Without an anchor (holding device), you are unlikely to be able to stay at the desired point in the reservoir for a long time. The installation of a holding device has nothing to do with the tuning accessory; most likely, this is one of the integral components for a watercraft. When fishing in the current, it is quite difficult to keep the watercraft at one point in the river, even for a short time.
To attach the anchor to the boat, you will need a specialized rope (cable) to fix the holding device. At the end of this cable, by means of tightly connected knots, it is required to make loops, after using a specialized bracket, it is necessary to fix one end of the rope to the holding device, and the other to the stem of the floating facility. The rope for the holding device is mainly fixed to the handle, which is used to comfortably drag the watercraft.
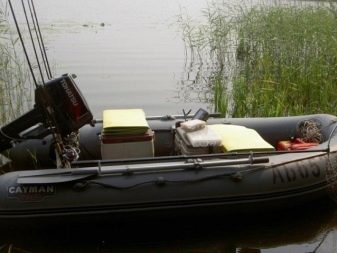
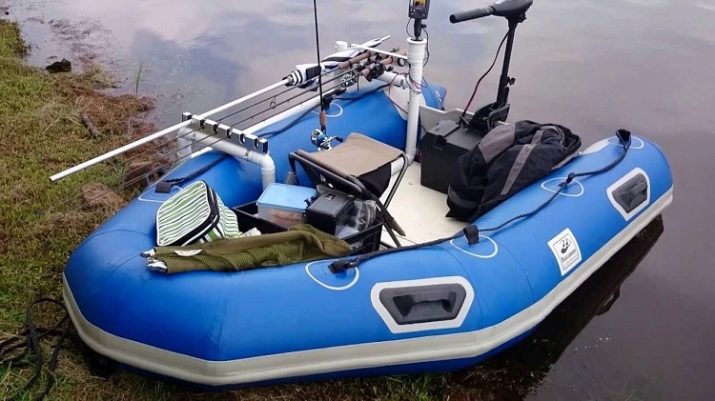
How to install holders for spinning?
When there are a lot of spinning rods, the floating facility is finalized in the form of mounting various holders. They can be attached to the hull of the boat using the following elements:
- bolts;
- screws;
- clamps;
- glue.
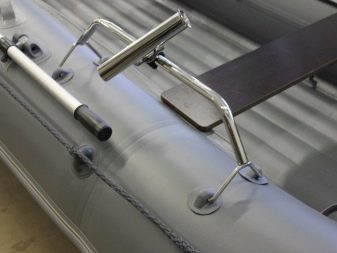
As stated above, for boats made of PVC, the optimal targa, equipped with several glasses, or a holder on a clamp. The most versatile mount for small PVC boats – it's a clampwhich can be practiced on any watercraft. Modifications, arranged by means of clamps, are fixed to various planes - a transom, a PVC boat cylinder or a bench.
Such a device can be freely installed and dismantled, and the working position can be adjusted and fixed by means of bolts and nuts. The only drawback is the rather large dimensions that this equipment has, which makes it difficult to control the watercraft.
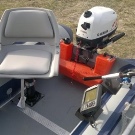
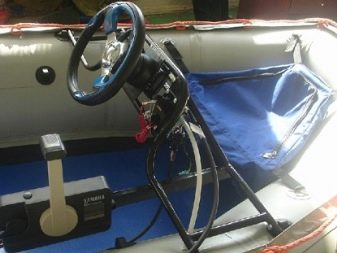
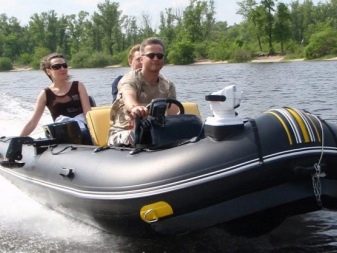
Remote motor control
On rubber boats of large sizes, the installation of a remote control for the outboard engine of the boat is practiced. The control place is installed on a specialized console, to which all the necessary communication means are connected:
- remote engine start;
- motor rotation control;
- gas-reverse control;
- tilt angle control (engine trim).
Taking into account the structure of the inflatable motor boat created a number of these consoles. A swivel chair with a height adjustment function can be supplied on a specialized platform for a skipper operating a watercraft at a distance.
The main advantage of this chair is a rather comfortable configuration and lumbar support. This device on large boats looks very harmonious.
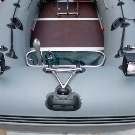
Is it possible to install such a console on a standard PVC boat? There are a number of particulars when installing this chair on a regular boat.
- The equipment in question is intended for mounting on a watercraft having cylinders (sidewalls) with a diameter of 43 to 50 cm. For sidewalls of other diameters, other dimensions of the supporting structure are required.
- When mounting the support structure on a PVC boat, it is necessary to simulate all the turning radii of the steering lever in the watercraft so that the lever does not cling to the chair and there are no obstacles to control the watercraft. Different boat engine manufacturers sell levers in various lengths. A suitable solution would be to move the seat slightly forward and use a small steering lever extension.
- If, with the ideal location of the chair, its base will be at the border of the elements, then in order to prevent damage to the aluminum profile, it is necessary to substitute some kind of shock-absorbing element under it, for example, a halt made of polyvinyl chloride material. The support should be fixed to two elements of the float of the watercraft.
- Since the level of landing in the chair is slightly higher than on a regular boat, it is necessary to glue the handle in parallel with the installation of the chair so that the skipper can hold on to it.
Transom increase
The normal deadwood height is 381 mm, but even in engines of the same manufacturer, it can vary by 20-25 mm. Due to the ideal position of the engine, it is possible to increase the speed of the boat and reduce the spray behind the boat. If you are installing the motor and the anti-cavitation plate is found to be below the required level, you can loosen the screws and set the appropriate transom height, and then make test runs. If you need to change the outboard engine, you can adjust the transom to the characteristics of the new engine, in particular, to the size of its deadwood.
Extra holes for the screws can be sealed with a sealing compound, and then select the required height of the engine mounting by fixing the plate in a suitable position.
In the next video, you will find a great example of tuning a PVC boat with your own hands.